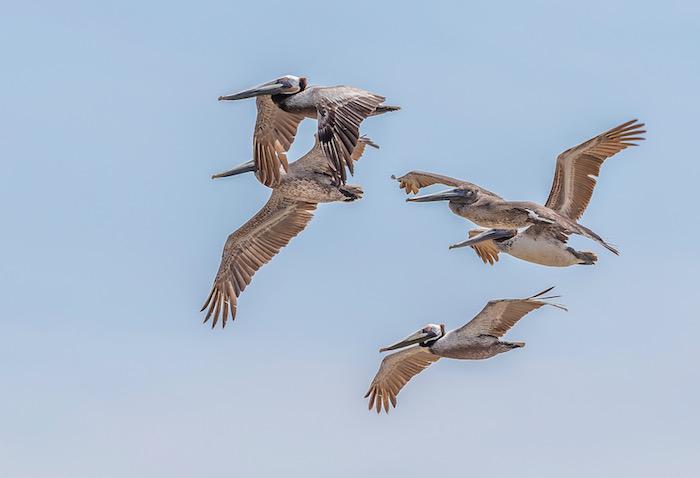
You have to be quick, and steady handed, to photograph birds in flight, such as these brown pelicans at Padre Island/Rebecca Latson
I’ve written more than once that fall is my favorite time of year for photography. Landscapes are sublime, with brilliant yellow, gold, orange and red foliage adorning aspen, maple, huckleberry, sumac and sassafras.
It’s not just landscapes, however, that make autumn such a spectacular season for you and your camera. The wildlife opportunities are wonderful, as well. Elk emerge from higher elevations for the rut, birds like the ptarmigan begin changing to their winter colors, and you’ll see fox, bears, marmots, and coyotes, many of them feeding and fattening up before entering their winter hibernation.
Practically no matter where you live in the country there’s a unit of the National Park System nearby to stalk the scenery with your cameras.
Chasing that majestic photo of a bull elk, his antler-heavy head tilted back as his bugle pierces the landscape? Yellowstone, Grand Teton, Rocky Mountain, and Great Smoky Mountains national parks are all good bets. But so are Buffalo National River in Arkansas, Olympic National Park in Washington state, Point Reyes National Seashore in California, Wind Cave National Park in South Dakota, and Niobrara National Scenic River in Nebraska.
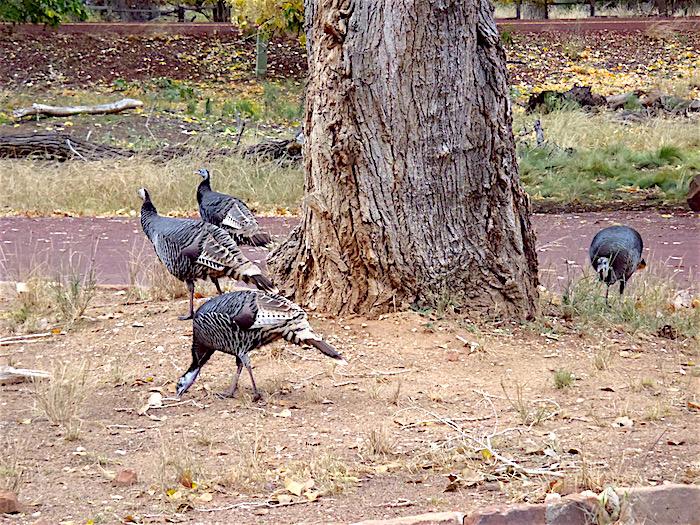
Turkeys can be seen in an array of parks, from Zion in Utah to Shenandoah in Virginia/Kurt Repanshek file
Prefer feathered models? Wild turkeys are plentiful in Great Smoky, Shenandoah in Virginia, Ozark National Scenic Riverways in Missouri, Bluestone National Scenic River in West Virginia, Acadia National Park in Maine, and Zion National Park in Utah. Shenandoah, Great Smoky, and Glacier National Park all are good places to scan the fall skies overhead for migrating raptors, too.
Black bears become more visible, too, in Great Smoky and Shenandoah, and in dozens of other parks, as well, as they work to put on the pounds. You might spot some along the Appalachian National Scenic Trail, Acadia, Little River Canyon National Preserve in Alabama, Mississippi National River and Recreation Area, and Amistad National Recreation Area, just to name several other park locations.

Great Smoky Mountains National Park is a good place to look for black bears/Gary Carter via NPS
Oh, itching for that ptarmigan shot? Head to the roof of Rocky Mountain National Park on Trail Ridge Road and scan the tundra with binoculars or your long lens to spot one of these unique birds.
To help you get the most out of your autumn wildlife photography experience, here are some tips for your use:
- First and foremost, exercise patience and keep your expectations realistic. Don’t expect to see wildlife emerging from around every corner of the road. Check with the visitor center and the rangers to learn about recent wildlife sightings. Drive the speed limit. The slow speeds through the national parks are set for a reason. You want to photograph the wildlife, not injure it.
- Respect the wildlife. Don’t crowd them, don’t chase them, don’t antagonize them, and don’t try to get them to move closer or pose for your camera by throwing things, yelling, waving your arms or acting in any sort of manner perceived as threatening. Not only will it stress the wildlife, but also you run the risk of harming yourself in addition to the animals. And definitely, do NOT feed the wildlife. Habituating a wild animal to human food sources endangers you, others, and the animal(s) you want to photograph.
- Be considerate of other viewers, photographers and non-photographers alike, who might be near you. They want to see the wildlife just as much as you. National parks are for everyone to enjoy, and you want to leave others with a good impression of yourself as a photographer.
- Use the biggest lens you can carry with you, which would be anywhere from 70-200mm, 100-400mm or even larger, like the 500mm, 600mm, and 800mm super-telephotos. You can rent these lenses for a fraction of the retail price from places like lensrentals. com, borrowlenses.com, and lensprotogo.com. With these super-telephotos, you can keep your distance from the wildlife and still get great headshots.
- Set your camera’s AF mode to focus while tracking moving subjects. Canon calls it AI Servo, Nikon calls it AF-F (full-time servo AF), Sony calls it AF-C (continuous AF), Pentax calls it AF.C (continuous mode).
- Consider utilizing a lens extender (aka teleconverter). Lens extenders screw onto the rear of a lens, which then attaches to your camera. They add a bit of magnifying “oomph” and come in various magnification factors. Multiply that factor by your lens focal length to get the new magnification. For example, a 1.4x teleconverter attached to a 500mm lens will give you a new focal length of 700mm. Not all lenses allow for extenders, however, and the auto focus may be affected on some lenses. Also, some photographers report their image results are a little less sharp when a teleconverter is added. My advice is for you to rent or borrow an extender and try it out before deciding whether you’d like to purchase one.
- Use a tripod. While I often handhold my 100-400 or 70-200mm lenses, I use a tripod with a gimbal head for my 500mm lens. A gimbal is a special tripod head that not only supports a large, heavy lens, but also allows you to pan and move the lens and camera up and down as easily as if you were handholding, but without weighing down your arms.
- Portrait photographers say the most important points to focus on are the eyes. A wildlife close-up is, indeed, a portrait. So, focus on those eyes.
- Incorporate your subject into the overall landscape if you can’t manage a close headshot. The results are lovely as you capture both subject and the environment in which your subject dwells.
I guarantee that these few tips will help you achieve some fantastic wildlife shots during your fall venture into a national park. Have fun, stay safe and keep the wildlife safe, too.


Add comment