A Maine forest floor next to Acadia National Park, taken with a Canon 100mm f2.8 macro lens. Photo by Rebecca Latson.
Back in September 2013, while photographing the multitudes of ruby-throated hummingbirds visiting my mother's feeders in her backyard, a large-ish, iridescent, green-backed, 'thing' landed on the ground not too far from a feeder. Because of its green color, I thought it was an injured hummingbird. Instead, it was one of the cicadas visiting this part of southeast Texas (their song can be deafening at times, drowning out the next-door neighbor's riding lawnmower).
I wanted so much to have a macro lens right at that moment, but I had to make do with the 100-400mm lens I had on the camera (perfect for capturing images of the hummingbirds, but not so much for capturing a close-up image of a cicada on the ground). The resulting photo, which I posted to my Facebook photography page, was considerably cropped to achieve a 'pseudo macro.' While the image was good-looking, I still wished for that dedicated macro lens.
(Note: My use of the word 'macro' in this article is interchangeable with the word 'close-up' to refer to any "super" close-up shot of a subject, be it taken with a telephoto lens, a dedicated macro lens, or one of the other options about which I write in this article.)
The Point & Shoot
Upon reading my lament about no macro lens, one of my FB fans mentioned that I should check out a point-and-shoot (P&S) camera, as they have great macro capabilities and are much cheaper than ' say ' a Canon 100mm f2.8L macro lens.
A point & shoot! Now why didn't I think of that? I owned one in the past, carrying it around in my purse all the time, for those just-in-case moments. I also used its macro capabilities to get nice close-ups of items I'd sell on eBay. No longer owning a P&S, I decided perhaps I should expend a little $$ for a new pocket-sized camera (the cost of the Pentax WG-3 that I ultimately purchased was about $276, including shipping). They've definitely come a long way regarding improvements and enhancements, at a fraction of the cost of an SLR.
Yes, I understand that I (and many other photographers out there) sound a bit elitist as I (we) wax lyrical about the virtues of using an SLR vs. a P&S. I will continue to wax lyrical about my SLRs, but that doesn't mean I have no use for any other type of camera or camera brands, for that matter (I'm renting a Nikon D800 and 24-70mm lens to take along with my Canons for a late spring trip out to Big Bend National Park, this year).

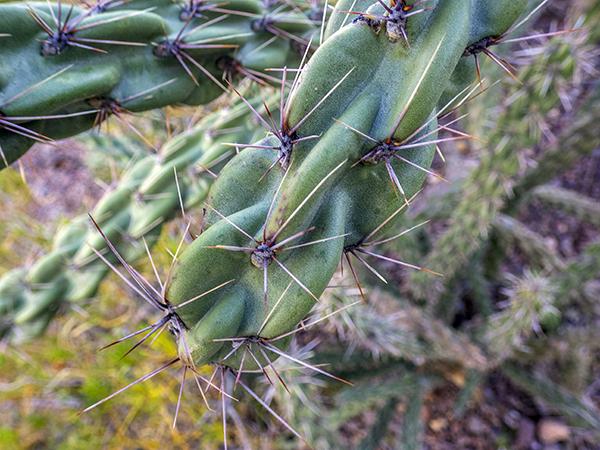
Cholla cactus, Big Bend National Park, taken with the Pentax WG-3 in macro mode. Photo by Rebecca Latson.
Close-Up Lens Filters
In addition to reviewing P&S models, I looked at other mediums utilized to capture really close-up images. I'd just received the latest edition of the National Association of Photoshop Professionals (NAPP) Magazine, which included its annual Holiday Gear Guide. Within that guide was a blurb for the Canon close-up lens filters.
These close-up filters are essentially glorified magnifiers using good glass and screwing onto the front of a lens just like any other filter. Available in several thread sizes (52mm, 58mm, 72mm and 77mm), the Canon-brand close-up lenses (they call them lenses, I call them lens filters) come in two types of magnification: the 250D for camera lenses that have a focal length of anywhere from 30mm to 135mm, and the 500D for camera lenses reaching anywhere from 70mm to 300mm. The cost ranges from a little over $80 to $150 (not including shipping). Oh, and the camera lenses don't have to be telephotos; I ordered a 250D filter for my Canon 40mm lens and took it with me to Big Bend National Park last year.
Granted, these little gizmos don't produce true macro images in the sense of the word, but they *do* allow for some very clear, close-up shots utilizing otherwise non-macro camera lenses (and they're fun to play around with, too).

A little yellow wildflower alongside the road, Big Bend National Park, taken with a 40mm lens and the Canon 250D close-up lens filter. Photo by Rebecca Latson.
Telling A Story and Producing A Reaction
Ok, so what's up with using a macro for a national park photo outing? Sure, I know you want dramatic wildlife portraits or beautiful landscape images encompassing the width and breadth of the amazing views in front of you. But, those are not the only two types of pictures to capture during your park visit, nor are they the only types for telling a story or eliciting a reaction.
For just one moment, take your eye away from your camera's viewfinder and that wide-angle vista during a vacation to someplace like Big Bend or Sequoia or Shenandoah or Everglades. Move in close to inspect the detail and texture of the redwood bark, or the pistils and stamens within that delicate little wildflower bloom, or the spikes on a cactus or the interesting insect on a plant stem. Point your lens in that direction and get all of the detail with a macro (or macro-type) shot.

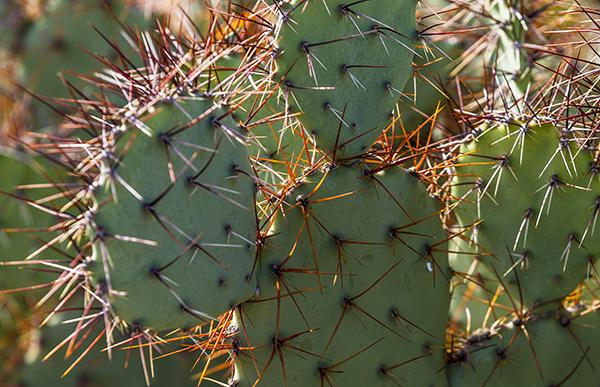
A spiny-fruited prickly pear cactus, Big Bend National Park, taken with the Canon 70-200mm f2.8 telephoto lens. Photo by Rebecca Latson.
When showing off your national park photos to friends and family, make sure you have added one or two close-ups to your panoply of landscapes and wildlife portraits. Take note of how your viewers will oooh and ahhh over those particular images with the magnified features of your subject found, perhaps, only within a particular national park. And, don't forget to pat yourself on the back for remembering to make it a macro kind of day.

 Support Essential Coverage of Essential Places


Comments
I do love a good Macro picture. Good shots of tide pools with a Macro get some interesting textures as well.