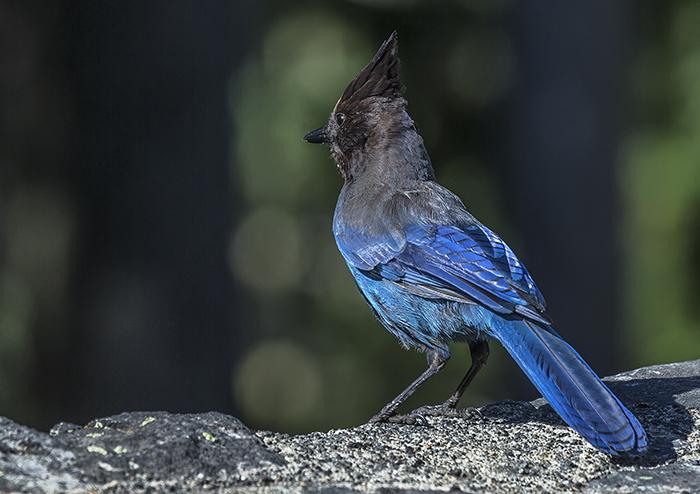
Steller's jay, Mount Rainier National Park / Rebecca Latson
In addition to closing out the Photography in the National Parks column for 2017, this article brings to an end my Armchair Photography Guide's photographic tour through Mount Rainier National Park. Part 1 led you through Sunrise, Part 2 took you along the Stevens Canyon Road toward Paradise, and Part 3 wandered around the Paradise area. This final Part 4 guides you down the road from Paradise to Longmire and on toward the park’s Nisqually entrance. For reference, you might want to download the map of Longmire trails in addition to the Mount Rainier National Park map.
Narada Falls
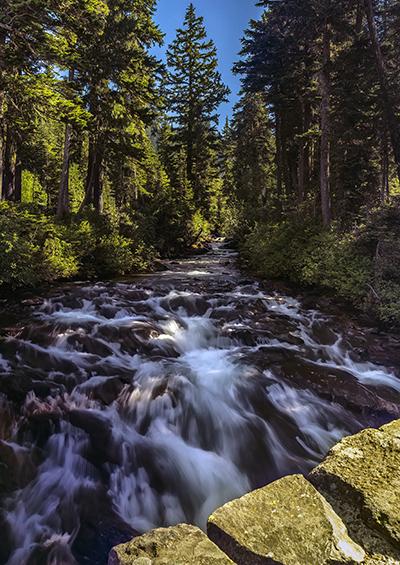
Looking up the Paradise River from the bridge over Narada Falls, Mount Rainier National Park / Rebecca Latson
Your first photo op for the morning will be at Narada Falls. It’s a good thing you departed Paradise so early because you’ll want to stop at this waterfall prior to 9 a.m. Heck, you'll probably want to arrive prior to 8 a.m. Narada Falls is one of the most popular stops along this route, and the parking lot fills early. Arrive anytime after noon, and you'll be maneuvering to avoid sideswiping cars parked on the side of the road, and people on foot all heading to the same spot. FYI, this goes double for Christine Falls, further down the way.
After unloading your gear, scan the parking lot for birds like the Steller’s jay. Have your camera and telephoto lens ready for a few shots of this bright blue-and-black bird before it takes wing, making certain to set your camera's focus to track movement (Canon calls it AI-Servo, Nikon calls this setting AF-C, Pentax calls it AF.C, and Sony calls it AF-C). Steller's jays, as well as other birds and wildlife, are constantly moving, so use the burst method of keeping your finger on the shutter button and letting the camera click for several consecutive shots. I guarantee at least one of those multiple shots will be sharp.
Now, put away your telephoto lens and pull out the wide-angle lens (zoom or prime) with ND filter (not grad ND filter) attached. Walk onto the stone bridge spanning the Paradise River and point your camera and tripod upriver for a few "silky water" shots. If you are unfamiliar with the term “silky water," it's a popular technique of achieving a smoothed, silky look to moving water like rivers, streams and waterfalls. The key is to use a slow shutter speed coupled with your ND filter to get the look you want without overexposing (blowing out) the highlights within the moving water. In a pinch, you can use your polarizing filter for the same purpose, although you may need to use faster shutter speeds. You might also want to attach your lens hood to avoid any side flare from the morning sun.
When you finish with the upriver shots, move to the other side of the bridge overlooking the river as it tumbles down the cliff, remove your ND filter and affix your polarizer filter, and frame your composition to include the top of the falls, the forested area beyond, and any of the people you notice leaning over the rock retaining wall on your right. Don’t wrinkle your nose at the thought of including people. Their addition adds a sense of scale.
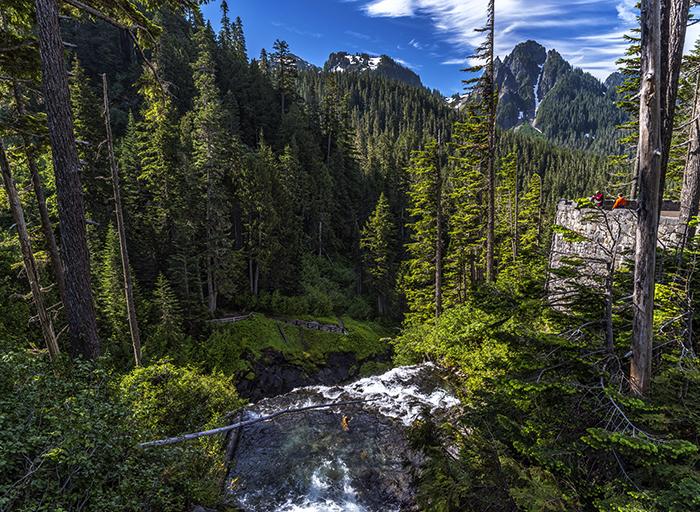
Looking down upon falls and forest, Mount Rainier National Park / Rebecca Latson
When you are ready, head down the trail to the Narada Falls fenced viewing area. Depending upon the season you visit, parts of the trail might still be a little wet with runoff from lingering snowpack, so take your time and use your tripod as a walking staff to steady yourself. Approaching the fenced viewing area, you’ll notice a constant curtain of fine mist blowing in your direction from the falls. This mist will create water droplets on your camera and lens. To counteract the mist, you might want to cover your camera with something like Vortex Media’s Storm Jacket or a Ruggard-brand rain covering. You can find both along with other rain cover brands at the online sites of BH Photo and Adorama. A lens hood should also help mitigate water droplets on the front of your lens. If you don’t feel like battling the constant mist, do what I did for the image below and choose a photo spot a little further up the trail, beyond the curtain of mist.

Narada Falls, Mount Rainier National Park / Rebecca Latson
Continuing down the road toward Christine Falls, you’ll have abundant photo ops at pullouts offering views of Mount Rainier and the valley below. If Ricksecker Point is open (it was closed for construction during my visit), take time to explore this one-way view loop. Keep your polarizer and grad ND filter handy to saturate color, deepen that blue sky, add texture to the clouds and mountains, and prevent overexposing the brighter portions of your compositions.
As you near the bridge spanning the Nisqually River, there will be one last large paved pullout to your left, if you feel like getting a shot of the thin ribbon of water flowing down the rocky slopes. While you are at it, why not just pause for a moment, stand quietly, and see what serendipity might offer.
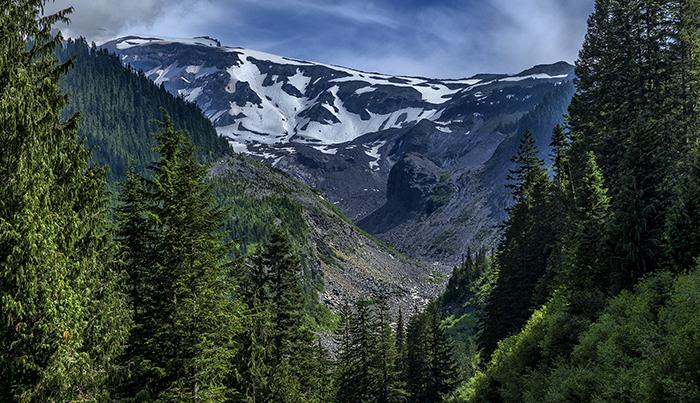
The down-mountain route of the Nisqually River, Mount Rainier National Park / Rebecca Latson
You see, while I was at this very pullout, getting ready to place my telephoto lens and camera back in the car, I detected movement out of the corner of my eye. Peering over the rocky slope beside the car, I saw a young marmot munching its way up to the road. The occasional noise of a passing car would send the marmot scuttling down the steep slope for a few moments before turning around to make a meandering ascent back toward my direction. This guy (or gal) was intent on eating every single wildflower along the road, and apparently, nothing was going to prevent that mission. My little friend didn’t seem to mind my presence as long as I stood very still. To keep movement to a minimum while achieving good close shots of the marmot, I utilized my 100-400mm telephoto lens, turned on the lens image stabilization, and made certain my focus mode was set to track movement. I applied the burst method and succeeded in capturing some clear, cute images.
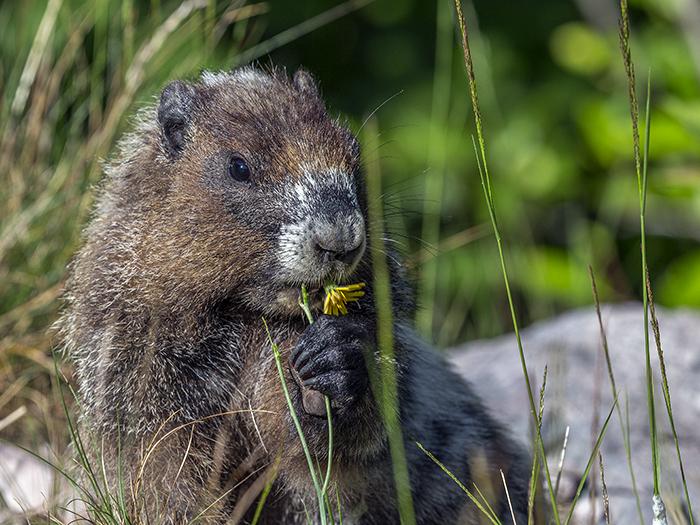
Marmot munching on that yellow flower, Mount Rainier National Park / Rebecca Latson

A yellow flower for breakfast, Mount Rainier National Park / Rebecca Latson
That same day, returning to Paradise after having photographed at Longmire for most of the morning and afternoon, I glanced over to that pullout to find every single wildflower gone.
Wildflowers
Speaking of wildflowers, depending upon the season, you should see all sorts of wildflowers growing beside or near any of the pullouts along the route from Paradise to Longmire. SLR camera users have a wide lens choice, from a macro to a telephoto to even a standard lens (cropping during the editing stage to get a close-up). If you are using a point-and-shoot camera, why not alternate between your camera’s macro and telephoto settings. Smartphones take nice flower shots, as well, although they have a difficult time focusing on flowers swaying in the breeze. Fill your frame entirely with the flower or try applying the Rule of Thirds technique and place your subject to one side, instead of in the middle, of your composition.
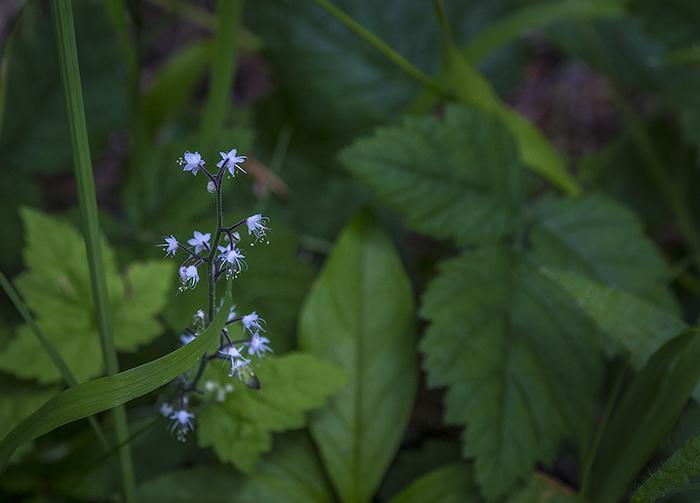
Delicate, tiny foamflower, Mount Rainier National Park / Rebecca Latson
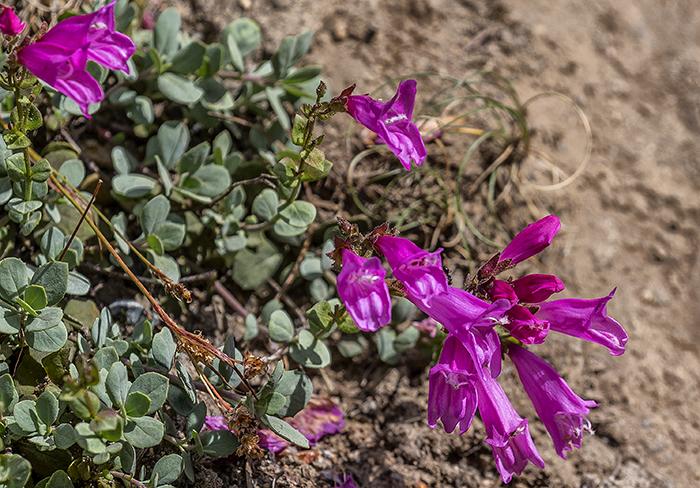
Rock penstemon, Mount Rainier National Park / Rebecca Latson
I mentioned cropping an image in a previous paragraph. To crop means to trim an image during the editing stage. Depending upon how much of each side you trim, you’ll create not only more of a close-up (handy for flower shots), but your composition may look totally different from the original. Most photo editing software provides a crop tool, the icon of which usually looks like a skewed square.
I’m sure you are thinking that it's easier to simply frame your image such that there is no need to crop and lose that digital data. My answer is that you might be picturing your subject framed a certain way, only to realize during the editing stage that perhaps you should have framed it another way, or taken more of a closer view of your subject. Edit and save your original uncropped image, then duplicate it, crop it, and save it again under a different file name so you can compare the two views.
Christine Falls
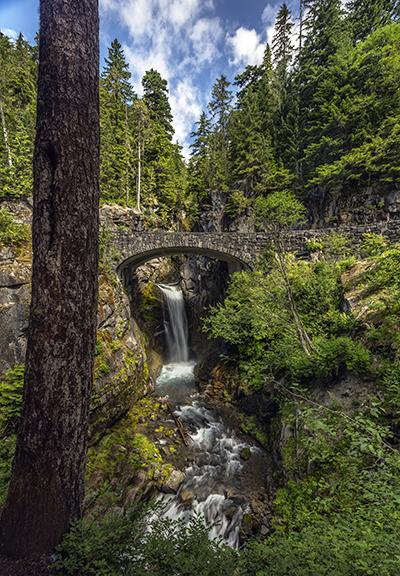
An early July morning at Christine Falls, Mount Rainier National Park / Rebecca Latson
After crossing over the Nisqually River, you’ll drive a little further and round a corner over Van Trump Creek to see the very small parking area for Christine Falls on your left. This is another waterfall view area overflowing with people after 9 a.m., and it’s much smaller than the Narada Falls parking lot. However, a stop here really is worth your time. I’ve pointed you to several waterfalls such as Falls Creek, Sunbeam Creek, Myrtle Falls, and Narada Falls; Christine Falls is one of my favorites.
The viewing area for Christine Falls is quite small, so you’ll need to be patient and wait your turn for a choice spot overlooking the scene. Set up your tripod and camera for both horizontal and vertical compositions. Definitely use your ND filter here for a silky water shot. You may need to time that shutter click in between the cars crossing over the bridge above the falls; car traffic increases as the day increases. Depending upon how proficient you are with your photo editor, you might also try removing the car with the software's clone tool (the term is “cloning out” an object).
Because there will be so many people wanting a turn at the prime spot in which you may be standing, try not to hog too much time. Get your photos then stand back and simply enjoy the view with your own eyes and not just through the viewfinder.
Longmire and the National Park Inn
You’ll know you are nearing Longmire and the National Park Inn when you pass the right-hand turnoff to Cougar Rock Campground. Drive another couple of miles and you’ll see the National Park Inn to your left. Pull in to the parking lot for a restroom or snack break before indulging in all the available photo ops around this National Historic District.
During a sunny day when you can see Mount Rainier, photograph all or a portion of the inn with the mountain in the background. Not only will people see what a great view this lodge is privy to, but the addition of at least a part of the National Park Inn will provide – again – a sense of scale and reference. I know, I talk about scale and reference a lot, but there are some images that beg for the addition of something to impart to the viewer the immensity (or the smallness) of that particular location as well as give the viewer a frame of reference. I even wrote an article about this very thing four years ago.

The National Park Inn through the trees, Mount Rainier National Park / Rebecca Latson

The National Park Inn, Mount Rainier National Park / Rebecca Latson
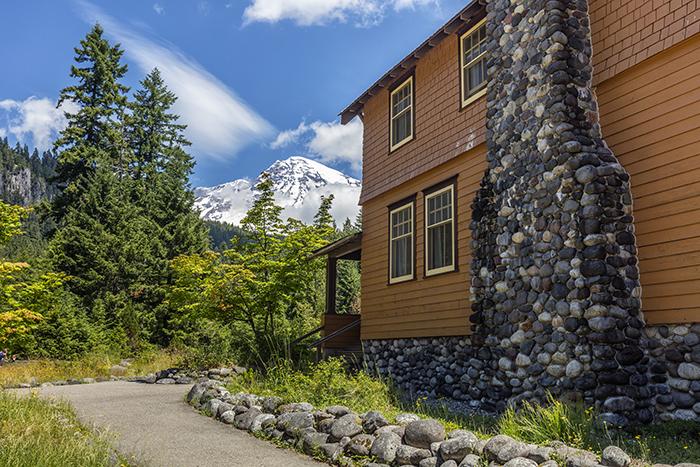
One heck of a view from the National Park Inn, Mount Rainier National Park / Rebecca Latson
Now, cross the highway at the crosswalk, turn around to face the inn and get one last photo from that vantage point. Serendipity might tap you on the shoulder, again, and you’ll be privileged to see a pretty little fox eyeing you from across the way before padding over to your side of the road.

Little fox across the road, Mount Rainier National Park / Rebecca Latson
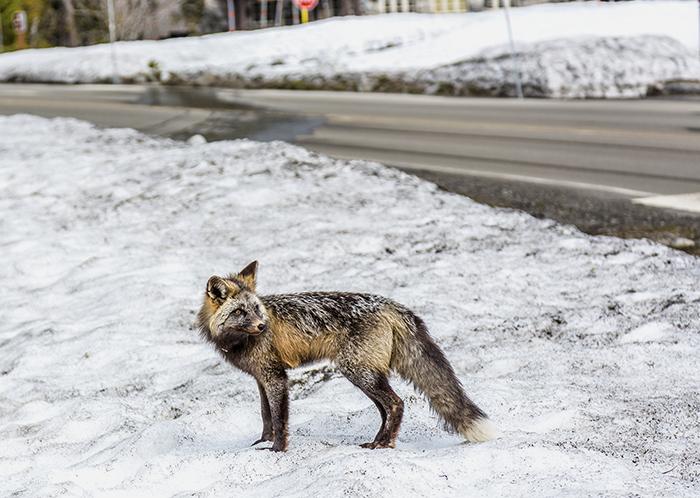
A pretty little fox at Longmire, Mount Rainier National Park / Rebecca Latson
Trail of the Shadows
Slowly wander the 0.7-mile Trail of the Shadows loop. Half of this trail guides you through a cool, shaded forest where you can set up a tripod and camera to capture mini-waterfalls framed by green moss encrusting brown tree roots. You'll also ramble past orange mineral springs bubbling with gases seeping up from the park’s volcanic depths, low manmade rock walls surrounding other, quieter mineral springs, and even a cabin built during the days when James Longmire homesteaded there.

Little waterfall along the Trail of the Shadows, Mount Rainier National Park / Rebecca Latson
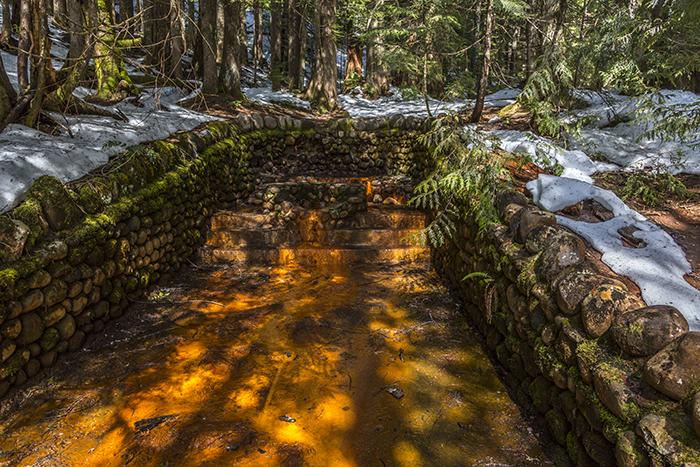
A rocked-in mineral springs along Trail of the Shadows, Mount Rainier National Park / Rebecca Latson
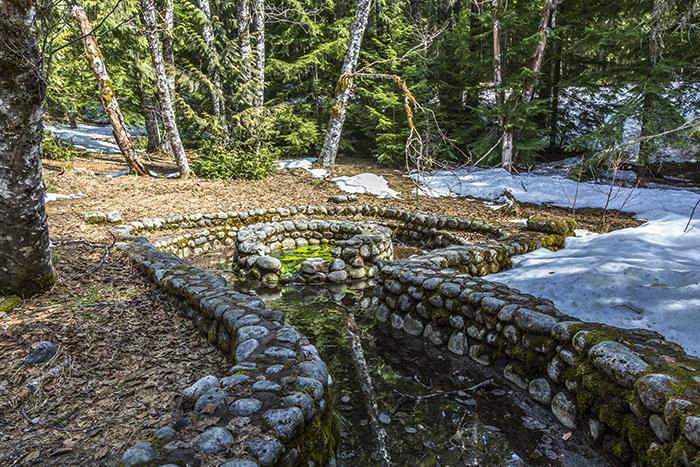
Another rocked-in mineral springs along Trail of the Shadows, Mount Rainier National Park / Rebecca Latson
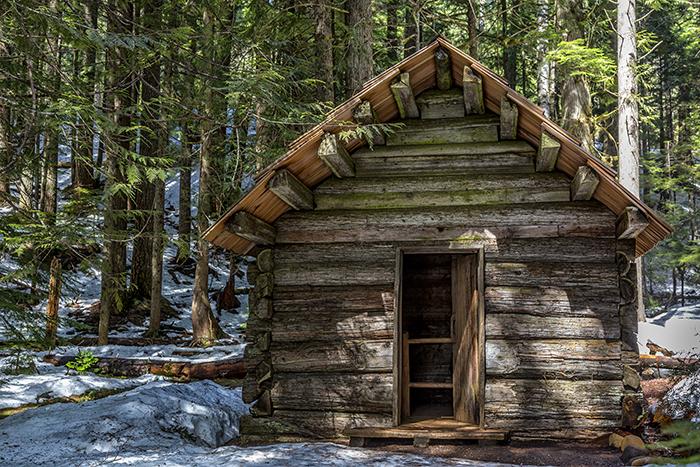
A cabin in the woods along Trail of the Shadows, Mount Rainier National Park / Rebecca Latson
As you walk around the edge of the forest, peer through the branches to view Longmire Meadow. You'll eventually emerge from the forest for more unencumbered views of the meadow, where you might notice small ponds and bubbling springs. Mount Rainier will be nicely framed by Rampart Ridge and trees at the meadow's northeastern end. To get a shot of meadow and mountain, you definitely want your circular polarizer filter and grad ND filter. Otherwise, you’ll get lovely images of Longmire Meadow, but your sky and mountain will probably be overexposed.

An early spring view from Longmire Meadow, Mount Rainier National Park / Rebecca Latson

An early summer view at Longmire Meadow, Mount Rainier National Park / Rebecca Latson
Twin Firs Trail

Walking along the Twin Firs Trail, Mount Rainier National Park / Rebecca Latson
Driving the road from Longmire toward the Nisqually entrance takes you through ancient, lowland forests of cedar, fir, and hemlock. About 2 miles southwest of Longmire is a small pullout to your right, next to the Twin Firs trailhead. It’s an easy loop trail less than a half mile in distance with an elevation gain of just 100 feet. Along this trail, you can contemplate moss "curtains" draping tree branches and carpeting the forest floor, and see nurse logs blanketed with seedlings and fungi. Pause a moment to savor the rich, earthy fragrance of cedar permeating the air. The colors are deep and shadowed, dappled with spots of sunlight peeking through the branches. Wander deeper into the forest along this trail and the noise of passing cars diminishes. You might be treated to a single-noted soliloquy or an energetic extravaganza from a lone songbird hidden within the trees.
Capturing the primordial mood along this trail requires no filter. A tripod is helpful and a variety of lenses may be used, depending upon what you wish to convey to your audience by your composition. Try a wide-angle lens (11-17mm) to encompass as much as possible of tall trees along the trail. With a really wide-angle lens, you'll notice an interesting perspective of the trees converging toward a point. Play around with positions; crouch low to the ground and move the lens up and down to see the difference in perspective, then stand up from the ground and do the same thing.
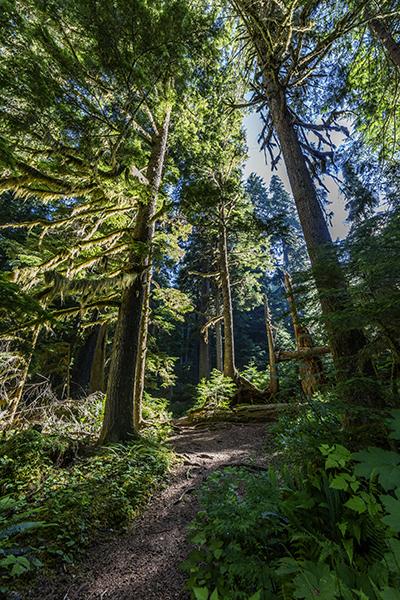
A 14mm view along Twin Firs Trail, Mount Rainier National Park / Rebecca Latson
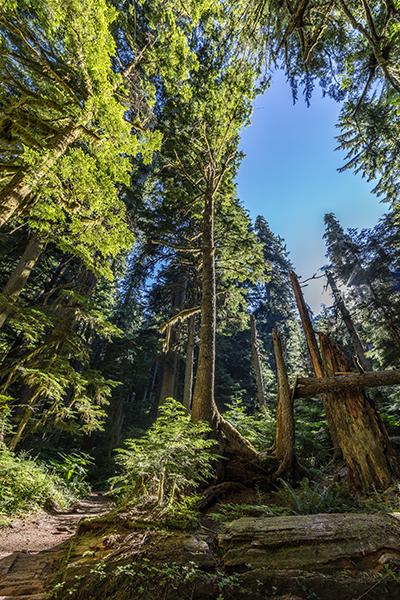
A wide-angle perspective along Twin Firs Trail, Mount Rainier National Park / Rebecca Latson
For other images along this trail, you might wish to produce a more intimate, contemplative composition with green and brown bathed by sunlight. For that, try a more standard zoom lens with a 24-70mm or a 24-105mm focal length.

Forest glow, Mount Rainier National Park / Rebecca Latson
Utilize your telephoto to zoom in and capture the textural differences between the hanging moss, branch leaves or needles, and tree bark.
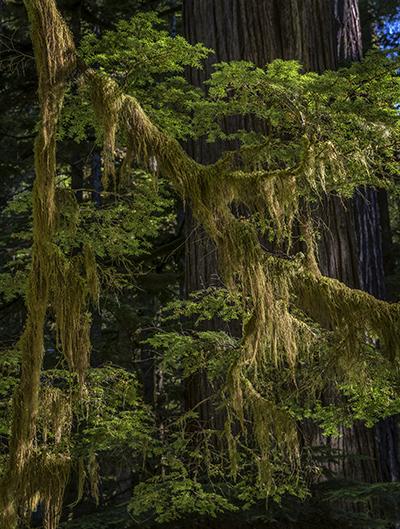
Lowland forest texture, Mount Rainier National Park / Rebecca Latson
During your editing, experiment with the application of a little vignetting to the corners and edges of your photo. Vignetting is an interesting technique for focusing the viewer’s eye on the center of the composition. If you are familiar with those old-time images of serious-faced settlers and pioneers sitting for a portrait, surrounded by a darker oval or circle, then you know the look I am describing.
Nisqually River
Along the route, a few miles prior to reaching the Nisqually entrance, you’ll notice pullouts to your left with great views of the Nisqually River. On the day I photographed the image below, it was overcast and cloudy at this lower elevation, providing a moody feeling to the composition. The gray in the sky complemented the gray in the rocks and the silver, swift-moving fingers of the river, all of which provided a stark contrast to the varying shades of green within the forest.
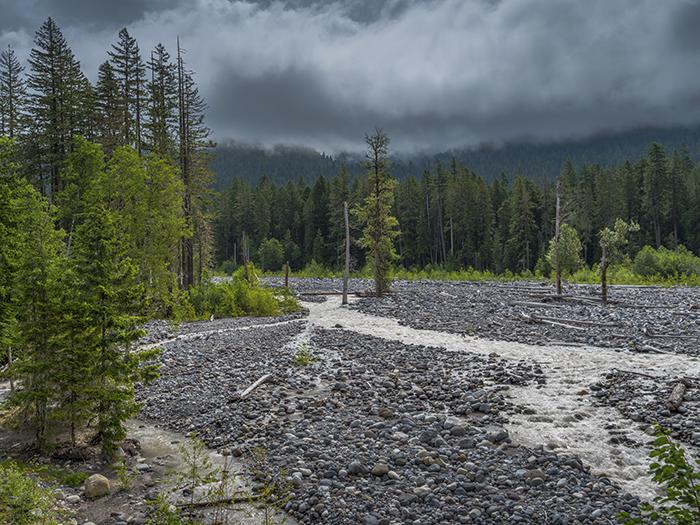
The Nisqually River, Mount Rainier National Park / Rebecca Latson
After reading Parts 1 through 4, you should now have a much better idea of places to see and photograph during your visit to Mount Rainier National Park. As I mentioned in Part 1 of this series, my Armchair Photography Guides are meant to familiarize you with easy-to-reach locations as well as encourage you to discover new places on your own for great photo compositions. Don't worry if you are at some popular spot where a gazillion photos have been captured already. Remember, the photo you take is yours, which makes it special. And don't get out at some location to take a photo simply because you see another photographer standing there. They might be photographing something interesting only to themselves and not to you. You don't need to follow the crowd. Stop and take a photo of someplace that you think makes for a great shot. Oh, and don't always point your camera at the scene that everybody else is photographing. Sometimes, turning the other way yields an equally lovely image for your photo album.
I think I've pretty much covered things. I want each and every one of you who has read this to be able to achieve wonderful photos that will bring back great memories of your trip to Mount Rainier National Park, as well as impress your friends and family. Use this guide to help you choose your own photo itinerary and have a grand photographic jaunt!


 Support Essential Coverage of Essential Places


Comments
LOVE the marmot!