You are here

Embrace And Enjoy Those Clouds

A moody morning on Lake Crescent, Olympic National Park / Rebecca Latson

A moody morning on Lake Crescent, Olympic National Park / Rebecca Latson

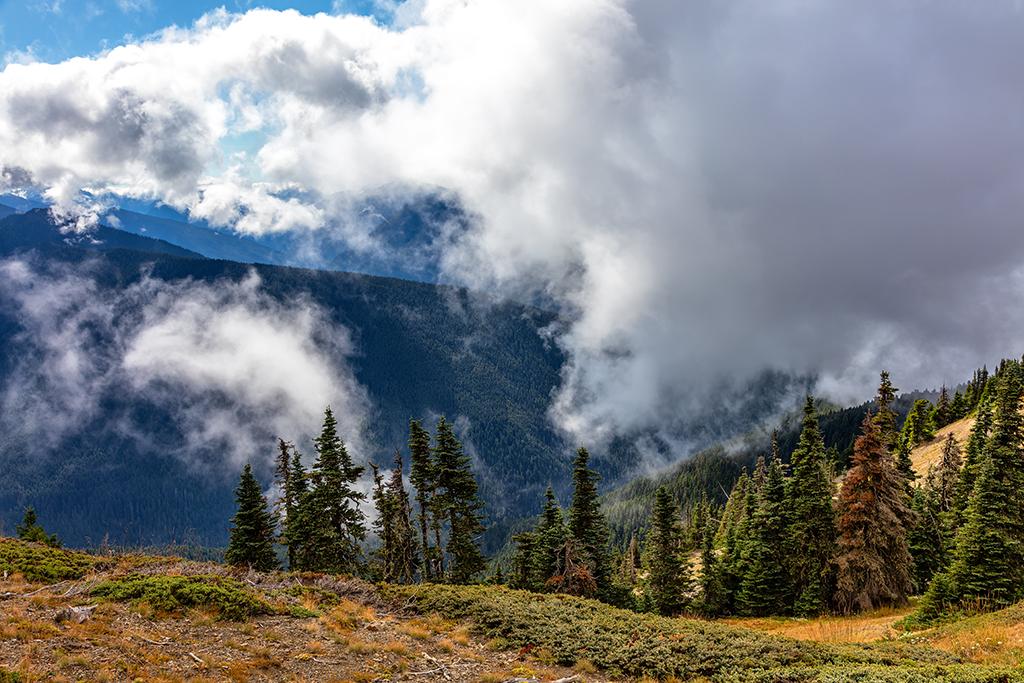
Clouds at Hurricane Ridge, Olympic National Park / Rebecca Latson

Clouds at Hurricane Ridge, Olympic National Park / Rebecca Latson

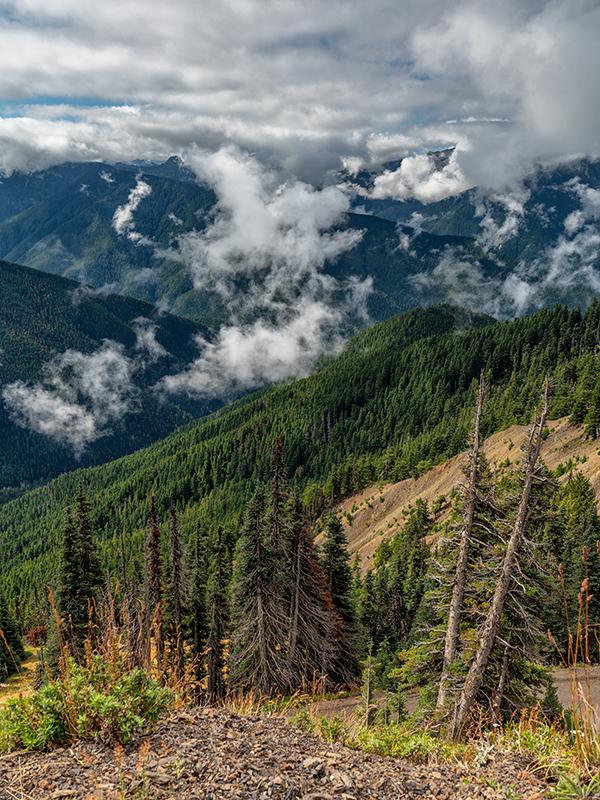
Cloudy scenery along High Ridge trail, Olympic National Park / Rebecca Latson

Cloudy scenery along High Ridge trail, Olympic National Park / Rebecca Latson

While it is drier in the park during the summer, the weather is still variable. This means you might get lucky and tour the mountains during an intensely cloudy day. Lucky? Sure! Many photographers don’t like shooting landscapes on clear days because the blue sky is so “ho-hum.” I’m not one of those photographers, but I agree that clouds add dimensions of depth, texture, and drama to a mountain composition.

For example, overcast, rainy weather surrounded me during my Lake Crescent and Hurricane Ridge visits. Clouds wreathed the mountains like pulled-apart cottonballs while scattered raindrops pattered down on the water, my camera, and me. Then, while on my way up Hurricane Ridge Road, fog and cloud cover increased, leaving me with a feeling I might not see much upon reaching the end of the road. I did note, however, the long line of cars at the park boundary entrance booth, indicating a little rain and fog wasn't stopping those people wishing to drive up the mountain. If you travel to this part of the Olympic Peninsula, you should think along those lines, too. Just because you don’t see what you expect (in this case, mountains) doesn’t mean you won’t return home with beautiful images to brag about to friends, family and colleagues.

If the clouds swath the mountains or your immediate vicinity is blanketed in a high cloud (aka fog), look for interesting shapes and silhouettes within that swirling mist to create a dreamlike, haunting landscape. As you view your images on your computer, you might notice your photos look a little on the grainy (aka noisy) side. This happens, sometimes, when photographing misty scenes. It's nothing that can't be fixed with some noise reduction software like Imagenomic's Noiseware, Noise Ninja, or Topaz Denoise, either stand-alone or as a plug-in to your photo editing program. Some photo editors come already packaged with noise reduction sliders and tools, such as Adobe Lightroom and Adobe Photoshop.

Hurricane Ridge in the mist, Olympic National Park / Rebecca Latson

Hurricane Ridge in the mist, Olympic National Park / Rebecca Latson

Layers Of Scenery, Color, And Texture

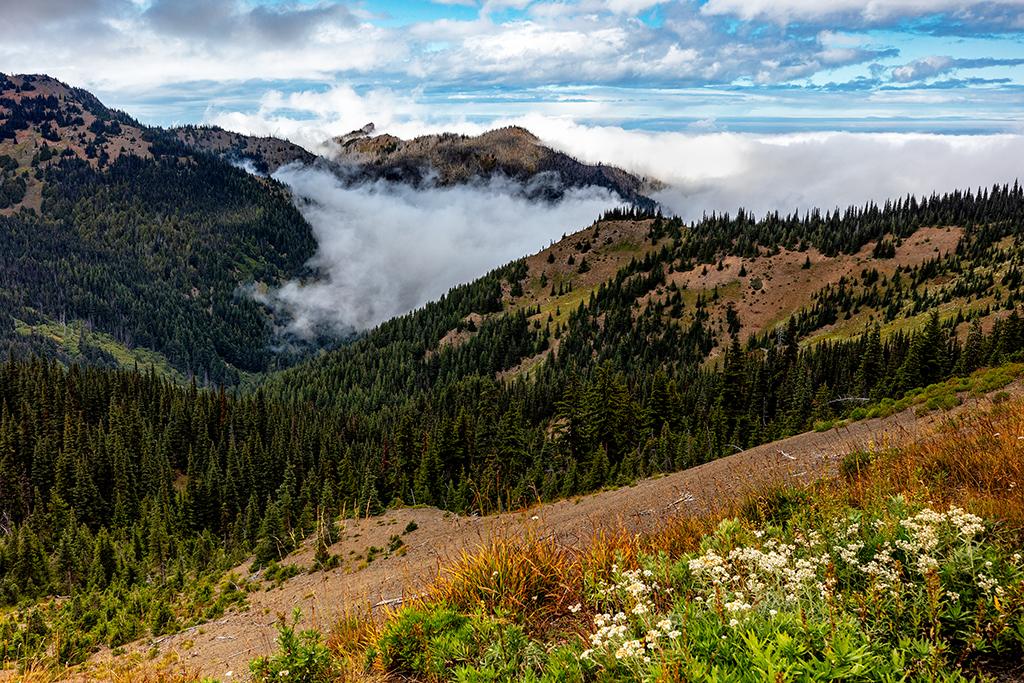
Back in mid-2018, I wrote an article for the Traveler about observing textures, colors, and patterns in your compositions. I wrote another article about finding the geometry in nature. While you are viewing the mountains from the shore of Crescent Lake, or along the trail or from the visitor center at Hurricane Ridge, look for layers of scenery. For instance, at the top of Hurricane Ridge Road, you’ll see meadows of golden grass outlined by dark green trees, with tall blue mountains towering in the background. Take notice of the craggy mountain textures versus the soft, wind-blown meadow grassland. Not only does all of this create eye-catching imagery, but the very act of looking for texture, color, patterns and geometry improves your powers of observation and photographic compositional skills.

Can you see the geometry, layers, color and/or texture in the images below?

Layers of scenery at Hurricane Ridge, Olympic National Park / Rebecca Latson

Layers of scenery at Hurricane Ridge, Olympic National Park / Rebecca Latson

Just before sunrise at Lake Crescent, Olympic National Park / Rebecca Latson

Just before sunrise at Lake Crescent, Olympic National Park / Rebecca Latson

An international view toward Canada, Hurricane Ridge, Olympic National Park / Rebecca Latson

An international view toward Canada at Hurricane Ridge, Olympic National Park / Rebecca Latson

Shaped by wind and snow, Olympic National Park / Rebecca Latson

Shaped by wind and snow, Olympic National Park / Rebecca Latson

Make It Monochrome

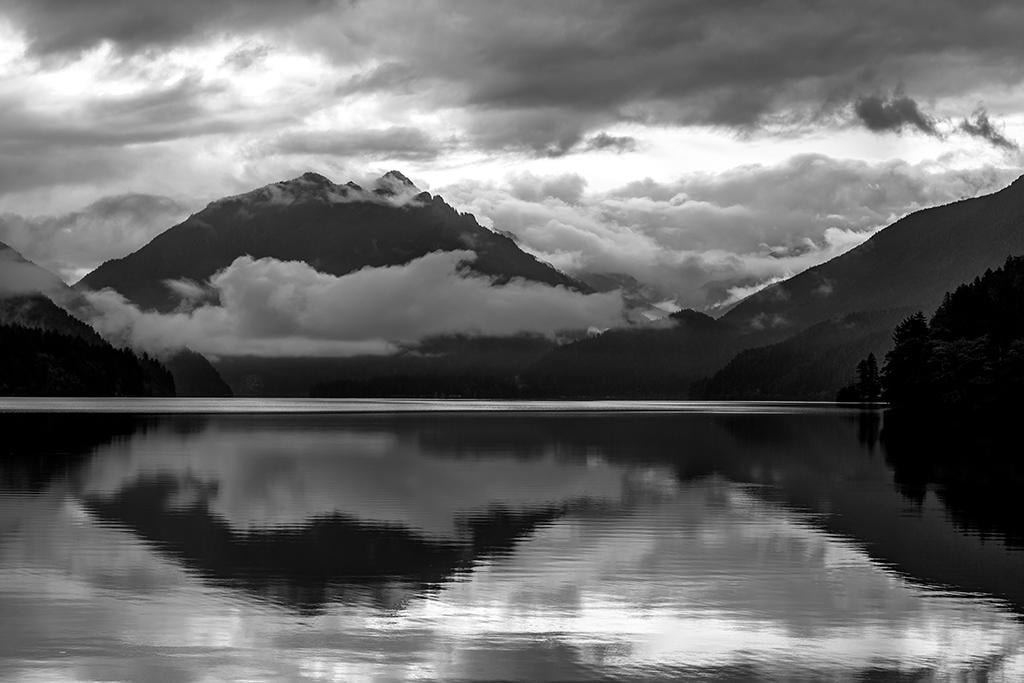
How many of you appreciate the works of photographer Ansel Adams? How many of you have noticed that mountain images (especially on cloudy days) look awesome in black and white because the monochrome tones bring out the subtleties of light, shadow, and texture? You see details you might not otherwise notice in a color photo of the same scene. Spice up your gallery of Olympic mountain images with a little black and white. Your camera might have a setting where you can immediately capture monochrome photos, but I advise you take a color photo then copy it with your image editing software and make that copy black and white. If you set your camera to take only monochrome images, you can’t switch them to color as you edit the photo. If you capture color photos initially, you can leave them as color or try them in monochrome during your edits.

A moody morning at Lake Crescent, Olympic National Park / Rebecca Latson

A moody morning at Lake Crescent, Olympic National Park / Rebecca Latson

Monochrome moodiness at Lake Crescent, Olympic National Park /  Rebecca Latson

Monochrome moodiness at Lake Crescent, Olympic National Park / Rebecca Latson

The trail through the mist at Hurricane Ridge, Olympic National Park / Rebecca Latson

The trail through the mist at Hurricane Ridge, Olympic National Park / Rebecca Latson

The trail through the monochrome mist at Hurricane Ridge, Olympic National Park / Rebecca Latson

The trail through the monochrome mist at Hurricane Ridge, Olympic National Park / Rebecca Latson

The living and the dead, in color, Hurricane Ridge, Olympic National Park / Rebecca Latson

The living and the dead, in color, Hurricane Ridge, Olympic National Park / Rebecca Latson

The living and the dead, in monochrome, Hurricane Ridge, Olympic National Park / Rebecca Latson

The living and the dead, in monochrome, Hurricane Ridge, Olympic National Park / Rebecca Latson

Hurricane Ridge scenery, Olympic National Park / Rebecca Latson

Hurricane Ridge scenery, Olympic National Park / Rebecca Latson

A monochrome view of Hurricane Ridge scenery, Olympic National Park / Rebecca Latson

A monochrome view of Hurricane Ridge scenery, Olympic National Park / Rebecca Latson

Try To Keep That Horizon Straight

As you photograph the lake and the mountains beyond, handheld or on a tripod, make sure your camera captures a straight horizon. Many tripods come with built-in levels. If your tripod doesn’t have a level, you can purchase a little level that slides into your camera’s flash hot shoe. Some cameras even come with built-in levels you can access through the menu settings. If you don’t have or want a level and your camera doesn’t have a built-in level, check your camera settings to see if you can turn on a grid display when you look through the viewfinder. You can then use the lines of the grid to help level your horizon. Check your photo editing software to see if the program provides a leveling / straightening tool. Adobe Lightroom and Adobe Photoshop both do, and they sure do come in handy.

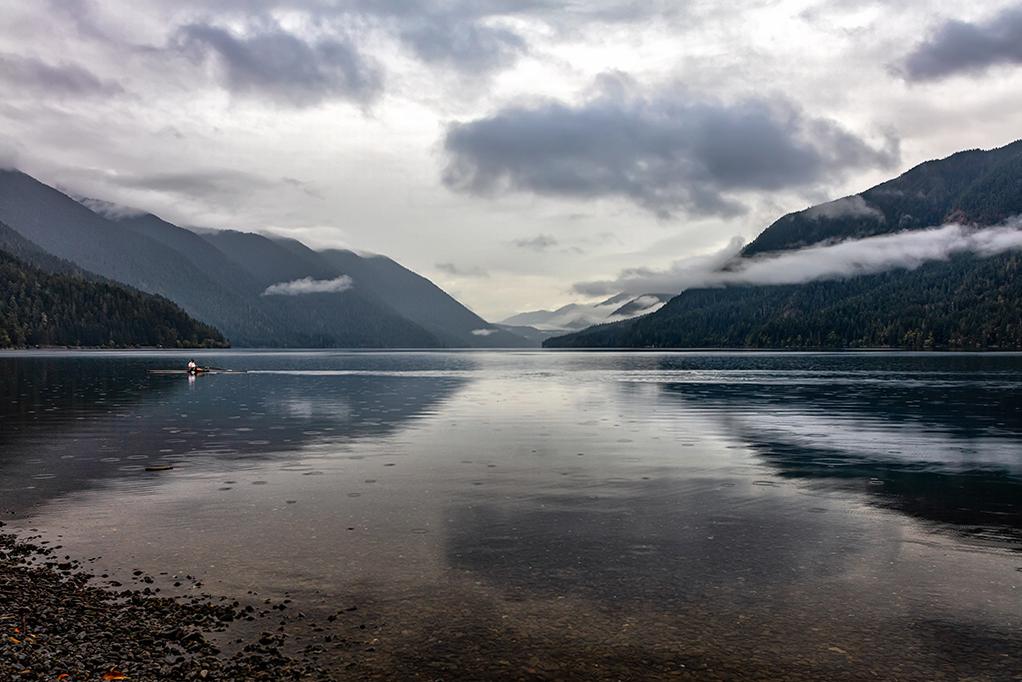
Sculling on Crescent Lake in the rain, Olympic National Park / Rebecca Latson

Sculling on Lake Crescent in the rain, Olympic National Park / Rebecca Latson

Telephoto Landscapes

While the panorama of Olympic mountain scenery will take your breath away and cause you to pull out your wide-angle lenses or wide-angle point-and-shoot settings, don't forget to capture a few "telephoto landscapes," as well.

Forest, clouds, mountain and glacier, Hurricane Ridge, Olympic National Park / Rebecca Latson

Forest, clouds, mountain and glacier, Hurricane Ridge, Olympic National Park / Rebecca Latson

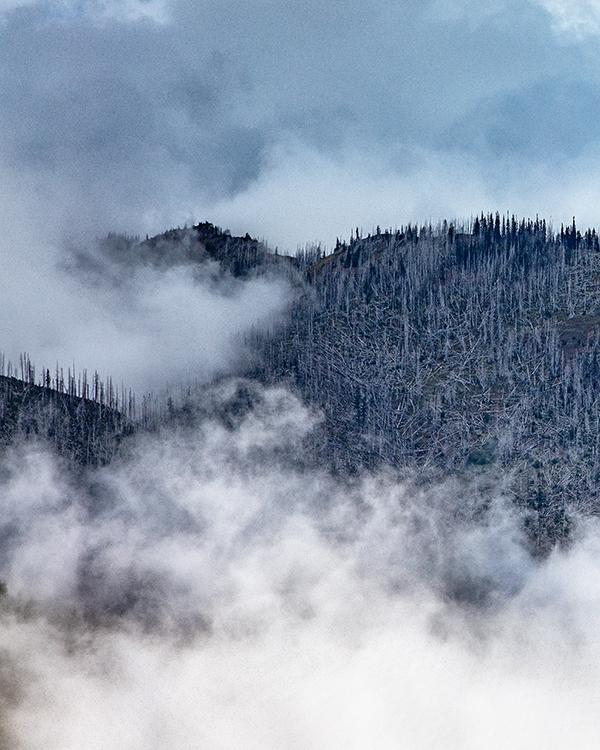
Evidence of a past forest fire at Hurricane Ridge, Olympic National Park / Rebecca Latson

Evidence of a past forest fire at Hurricane Ridge, Olympic National Park / Rebecca Latson

Unicorn Peak, Unicorn Horn, and Griff Peak, Olympic National Park / Rebecca Latson

Unicorn Peak, Unicorn Horn, and Griff Peak, Olympic National Park / Rebecca Latson

Prepare Yourself And Your Camera For The Weather

Even during the summer, weather around Lake Crescent and up at Hurricane Ridge can change in an instant, from breezy sunshine to overcast skies, rain, and chilly gusts of wind. During the two days I spent exploring the area, I ran into sun, fog, and rain. But, I was prepared. You should be prepared too, with a hat and light rainjacket for yourself, and some sort of rain covering for your camera. Online photo sites carry quite a few brands of camera covers in a range of prices, like Ruggard, Op-Tech, and Vortex Media. SLR users should also use their camera's lens hood to prevent rain drops from collecting on the lens glass. If you do happen to get a little moisture in front of that lens, pull out the microfiber cloth you remembered to bring with you to wipe away the wet.

Use Your Powers Of Observation

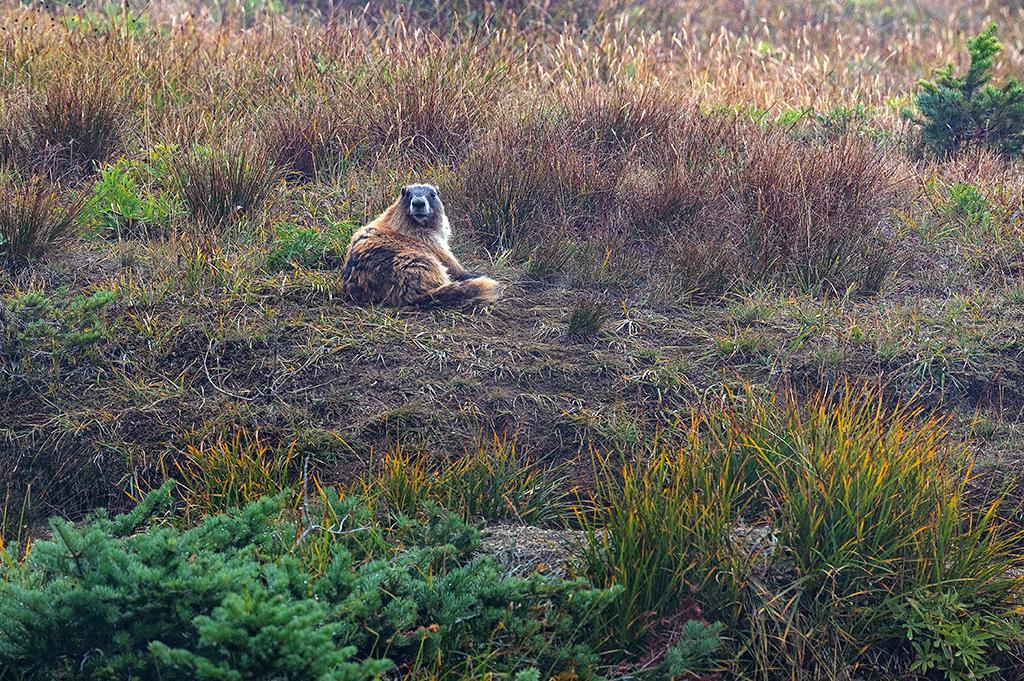
I've written this piece of advice in both Parts 1 and 2, so I'll remain constant and write it here, in Part 3. Observe your surroundings. Take time to really look around you and then take more time to frame your composition. Don't opt for a grab shot. You might just miss spotting something interesting, like an Olympic marmot posing on the hillside, startling unsuspecting hikers with its occasional high-pitched whistles. The more you look, the more you'll see, and the more you'll improve your compositional and photographic skills.

I spy with my little eye ... Olympic National Park / Rebecca Latson

I spy with my little eye ... Olympic National Park / Rebecca Latson

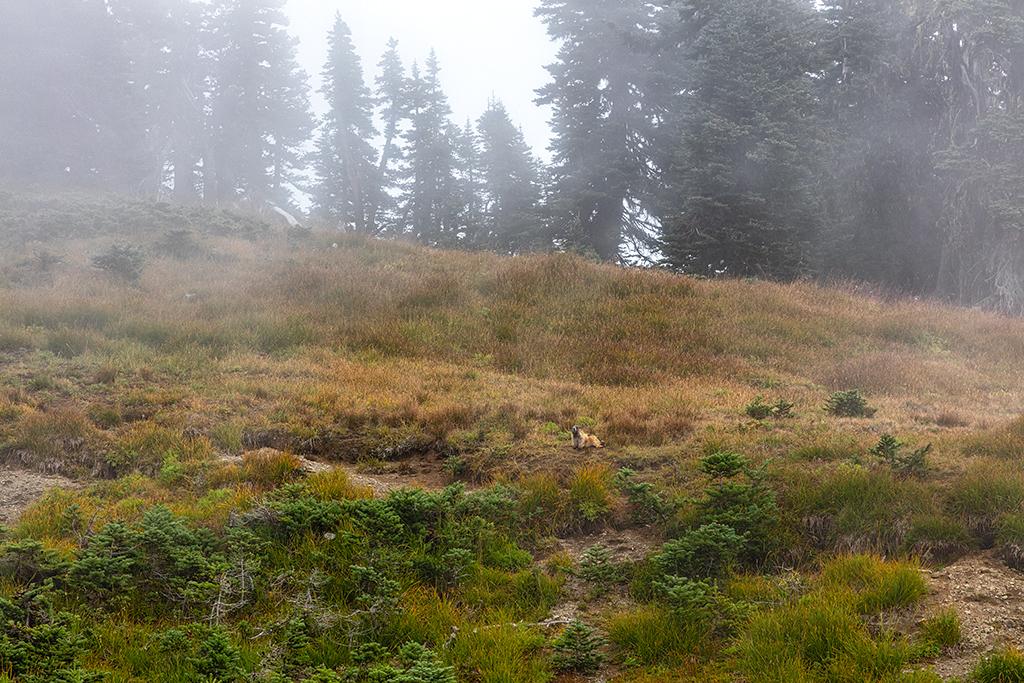
...an Olympic marmot in the mist, Hurricane Ridge, Olympic National Park / Rebecca Latson

...an Olympic marmot in the mist, Hurricane Ridge, Olympic National Park / Rebecca Latson

After reading all three parts of this Armchair Photography Guide, you should now be ready to head forth and explore Olympic National Park and create fabulous beach, forest and mountain images of your own. Have fun, pack out what you pack in, and stay safe.

A smartphone shot of a quiet, Lake Crescent morning, Olympic National Park / Rebecca Latson

A smartphone shot of a quiet, Lake Crescent morning, Olympic National Park / Rebecca Latson

“The mountains are calling & I must go & I will work on while I can, studying incessantly.” John Muir wrote those words in an 1873 letter to his sister. Having been born in northwest Montana, I can attest to the mountains’ invitation. I, in turn, would like to invite you to the mountains of Olympic National Park.

If you’ve read Part 1 and Part 2 of my Armchair Photography Guide to Olympic National Park, you will have learned tips and techniques for photographing the beaches and forests within this vast piece of land on the Olympic Peninsula. In Part 3, it’s time to see where and what to photograph of the Olympic Mountains from pullouts, parking areas, and short trails. Whether you are a first timer or a repeat visitor to this place, what you read in this guide will hopefully help you create your own gorgeous images to show friends, family, and colleagues the story of your Olympic National Park adventure.

My own mountain photo journey began along the southern shores of Lake Crescent, ending at an elevation of 5,242 feet on Hurricane Ridge. The yellow on the park map below outlines my combined winter and summer routes, while the red line indicates where I traveled for mountain shots.

A map route to the mountains, Olympic National Park / NPS / Rebecca Latson

A map route to the mountains, Olympic National Park / NPS / Rebecca Latson

Lake Crescent

After spending time in the Sol Duc valley for forest photos, you’ll be ready to return to Highway 101 and travel east along Lake Crescent’s southern and northeastern shoreline. There are several pullouts along the shore side of the road, including the parking lot of Fairholme Store. Watch for oncoming traffic before wheeling into a pullout as the road is quite busy with regular cars and logging trucks.

A smartphone view of the mountains around Lake Crescent, Olympic National Park / Rebecca Latson

A smartphone view of the mountains around Lake Crescent, Olympic National Park / Rebecca Latson

Further east, beyond the various lakeside pullouts, follow the sign to Lake Crescent Lodge and turn left onto the narrow road. Whether you stay at this historic lodge or not, you can capture some wonderful images of both building, dock, and lake. Yes, include people and manmade structures in a few shots to add reference and scale for your viewing audience.
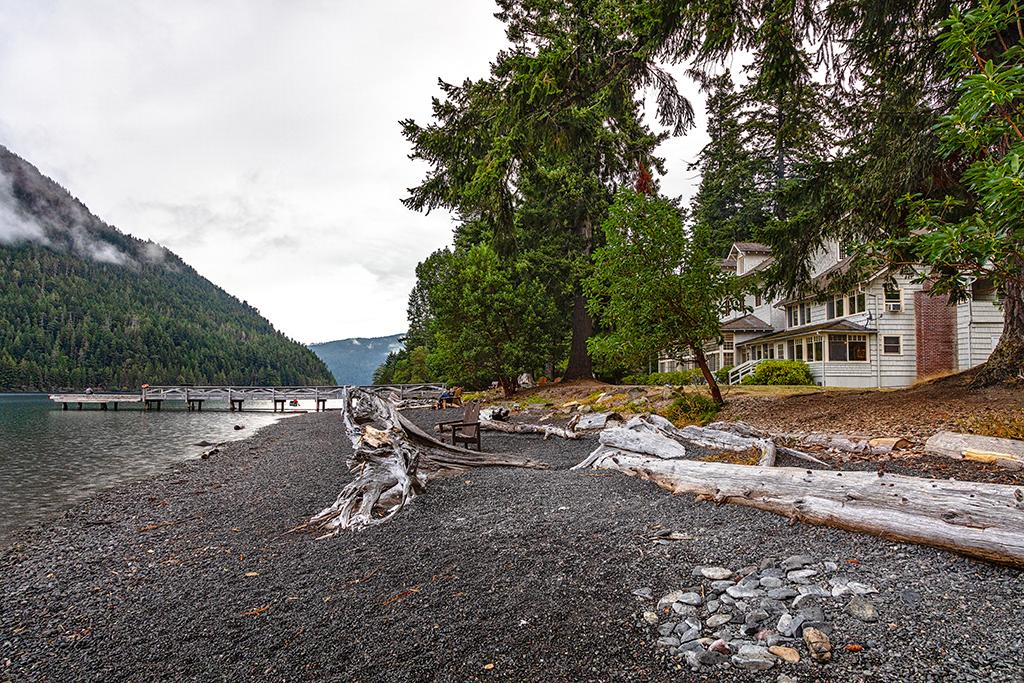
The lodge, the beach, the dock, and the lake, Olympic National Park / Rebecca Latson

The lodge, the beach, the dock, and the lake, Olympic National Park / Rebecca Latson

Take a photo of a scene both with and without people and decide which one you feel makes the most impact.

An early-morning view of the dock and scenery at Lake Crescent, Olympic National Park / Rebecca Latson

An early morning view of the dock and scenery at Lake Crescent, Olympic National Park / Rebecca Latson

Standing on the dock in the morning at Lake Crescent, Olympic National Park / Rebecca Latson

Standing on the dock in the morning, at Lake Crescent, Olympic National Park / Rebecca Latson

If you are staying in one of the upstairs historic rooms with a lakeside view, take a photo through your window to capture the view outside. The window frame and curtains make a nice natural frame for your subject.

A view with a room, Lake Crescent Lodge, Olympic National Park / Rebecca Latson

A view with a room, Lake Crescent Lodge, Olympic National Park / Rebecca Latson

Early mornings (6:30 a.m. to 7:30 a.m.) are great times to photograph the scenery right outside the lodge. Not many people are stirring, yet, and the lake water is generally still and smooth. Walk onto the dock. Get a leading line image of the dock as it stretches out and over the water, then turn your tripod and camera toward the shore for another leading line shot looking up toward the lodge.

The Lake Crescent Lodge dock, Olympic National Park / Rebecca Latson

The Lake Crescent Lodge dock leading line, Olympic National Park / Rebecca Latson

Up the dock and toward the lodge, Olympic National Park / Rebecca Latson

Up the dock and toward the lodge, Olympic National Park / Rebecca Latson

Walk along the pebbly shore. SLR users, bring along your circular polarizer (CPL) and graduated neutral density (grad ND) filters. The CPL filter, which screws over your lens and acts much like your sunglasses, will remove surface glare and reflections from the water so you can see into the depths of the clear Lake Crescent. The grad ND filter, a half clear-half shaded piece of resin or glass, will keep the brighter horizon from overexposure (blowing out) while you adjust your camera settings for the darker foreground. If you have never heard of either of these filters, check out this article I wrote for the Traveler a few years back. CPLs are also great for emphasizing texture and color to any stray rainbow you might encounter on a cloudy day.

An early-morning rainbow at Lake Crescent, Olympic National Park / Rebecca Latson

An early-morning rainbow at Lake Crescent, Olympic National Park / Rebecca Latson

Make use of a foreground object like a log or a large rock poking out of the water. Foreground objects add a sort of 3-dimensional depth to your composition, with a foreground, middle ground, and background. Foreground objects also act like leading lines, with the viewer's eye starting at the front of photo on that foreground, then moving to the background. A wide-angle lens (14mm - 35mm) or the wide-angle setting on a point-and-shoot work well at keeping everything focused, while creating slightly different perspectives to the image, depending upon whether or not you are standing over, or hunkered down close, to the foreground object. And, speaking of perspectives, photograph the same scene from different angles. 
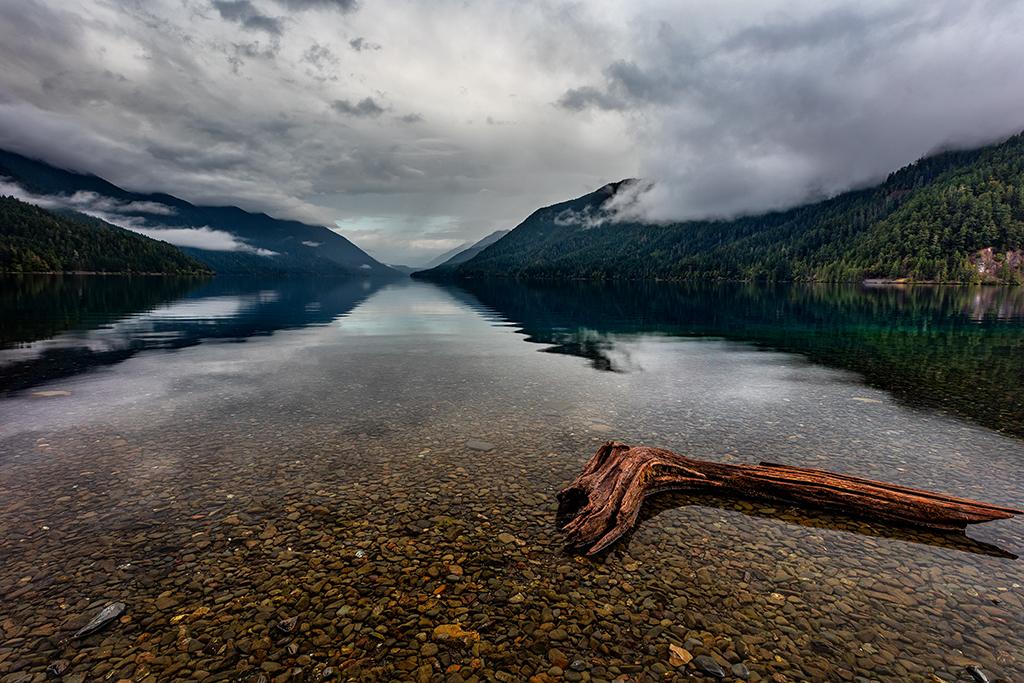
The log in the lake, Olympic National Park / Rebecca Latson
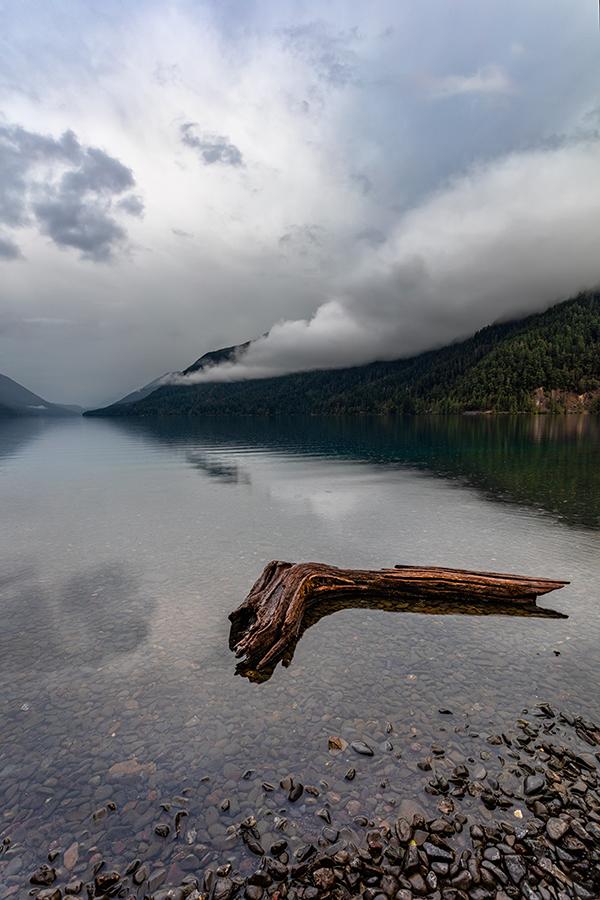
The log in the lake, Olympic National Park / Rebecca Latson

A vertical shot of that log in the lake, Olympic National Park / Rebecca Latson

A vertical shot of that log in the lake, Olympic National Park / Rebecca Latson

A different perspective of that log in the lake, Olympic National Park / Rebecca Latson

A different perspective of that log in the lake, Olympic National Park / Rebecca Latson

Don't forget to turn your tripod and camera around to photograph any interesting scenes behind you.

Lake Crescent shoreline scenery, Olympic National Park / Rebecca Latson

Lake Crescent shoreline scenery, Olympic National Park / Rebecca Latson

On a cloudy day, you might even want to try your hand at a time-lapse video with your point-and-shoot, SLR, or smartphone. All you need is a little patience and about 25-30 minutes of uninterrupted real time. Oh, and if you are using your smartphone, you’ll want a tripod mount. Handholding a time-lapse is a recipe for disaster. You can get smartphone tripod mounts on Amazon for $6.

From Lake Crescent, it’s about an hour to the top of Hurricane Ridge. Check in at the Olympic National Park Visitor Center for literature and information before heading up the road for your day of mountaintop photography. Stop at any of the pullouts along your way up the twisty-turny route.  About a quarter-mile prior to your arrival at the Hurricane Ridge Visitor Center parking lot, you'll see a large pullout to your left overlooking the dirt and gravel Obstruction Point Road. Set up your tripod for some awesome panoramic views. You might even see a lone backpacker hiking back up that road.
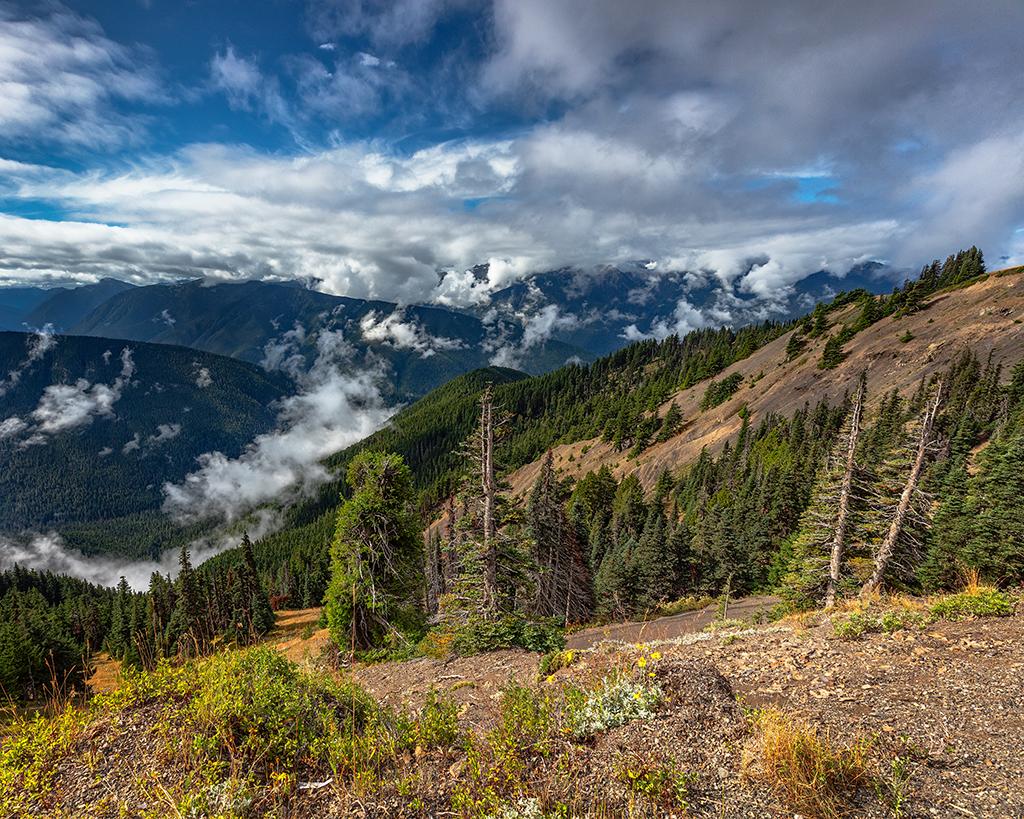
Olympic mountain scenery, Olympic National Park / Rebecca Latson

Olympic mountain scenery, Olympic National Park / Rebecca Latson

Hiking back up Obstruction Point Road, Olympic National Park / Rebecca Latson

Hiking back up Obstruction Point Road, Olympic National Park / Rebecca Latson

The breeze can be strong at that higher elevation and you'll become mesmerized by the swirling clouds. What do you think a scene like that might be perfect for? Yup - more time-lapse videos.

Featured Article

Comments

Loved this series. But amazingly enough got many of the exact same shots during my visit to the park on my smartphone with no guidance whatsoever. 


That's great, Eddie! I'm glad you didn't need any guidance. Others, though, appreciate a few tips and techniques they might not have thought of before, and that's what this Armchair Photography Guide series is all about. It's for those people who are not able to or do not want to travel out into the backcountry loaded down with camera gear. These guides are examples for others of how they can achieve great images at pullouts, view areas and short trails, regardless of whether they use a smartphone, point-and-shoot, or SLR. My Armchair Photography Guides are sort of "jump-starters" for others who want to capture photos and memories of their national park visit to share with their friends, family, and colleagues, and I hope these guides are helpful.


I liked the layers of scenery on Hurricane Ridge best and found the time lapse of the cloud cauldron to be very mesmerizing!


Add comment

CAPTCHA

This question is for testing whether or not you are a human visitor and to prevent automated spam submissions.

Image CAPTCHA
Enter the characters shown in the image.