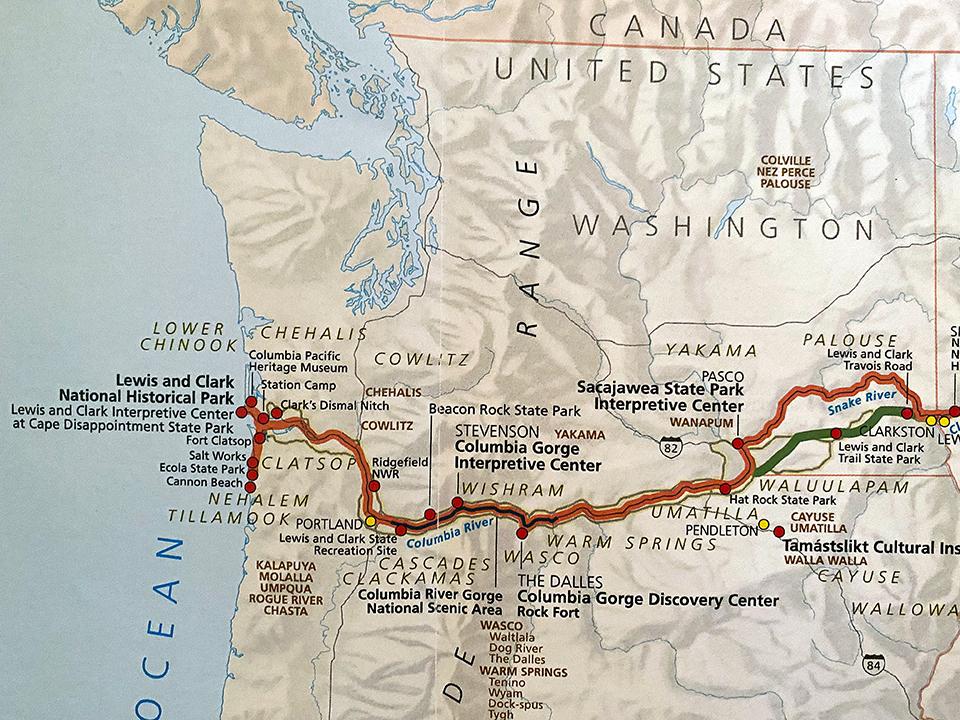
There are many sights to see along the Pacific Northwest portion of the Lewis and Clark National Historic Trail / National Park Service
When I first began researching the Lewis and Clark National Historic Trail, I was surprised at the number of sights along the Washington portion, including state parks! I shouldn’t be surprised, though. State parks often work in concert with the National Park Service. Just look at Redwood National and State Parks in California!
I noticed Cape Disappointment State Park listed among the Washington section of the trail and decided to take a look through Flickr at the kind of images one could photograph there. In addition to searching through the Traveler’s past articles, Flickr is my go-to for images of a particular place to get an idea of what I might see once I’m on location. Btw, did you know the Traveler has a Flickr page?
What grabbed my attention on Flickr was the number of gorgeous king tide photos captured at Cape Disappointment. Those images sealed the deal for me, and I began planning a 3-day trip to this state park.
FYI, a king tide is “a popular, non-scientific term people often use to describe exceptionally high tides that occur during a new or full moon,” according to noaa.gov. According to epa.gov, king tides occur "once or twice every year in coastal areas." Cape Disappointment, itself, was so named by British Captain John Meares, who found the cape but failed to find the Columbia River’s entrance. He was disappointed ...
Getting There
While there are several different routes to Cape Disappointment, I once again chose to travel Washington State Route 14, paralleling the Columbia River. That highway doesn’t reach all the way to the Pacific, though, so at the outskirts of Vancouver I hopped onto Interstate 5 North to Longview. Once in Longview, I crossed the Lewis and Clark Bridge for a westerly drive to the Oregon port city of Astoria.

The Lewis and Clark Bridge and modern development along the Columbia River at Longview, Washington, Lewis and Clark National Historic Trail / Rebecca Latson
There are a couple of view areas right after exiting the bridge on the Oregon side. You should stop at one or both to take a look back toward Longview. I’ll wager Lewis, Clark, and the Corps of Discovery would never have imagined the development along the river at this spot, or the dizzying, 1.5-mile-long bridge named after them.
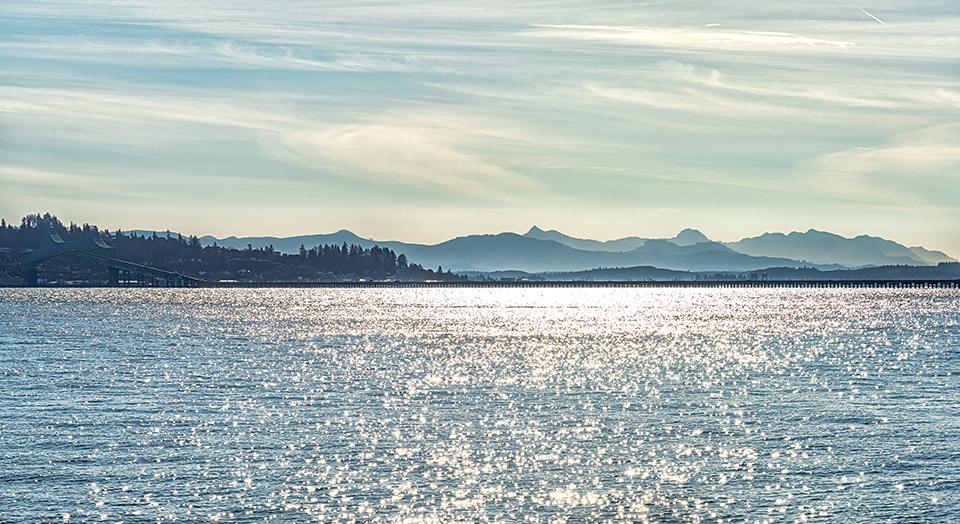
A late-afternoon view of the Astoria-Megler Bridge and the mountains in Oregon, Lewis and Clark National Historic Trail / Rebecca Latson
Astoria is a cool little town that probably gets pretty busy during the summer months. I could have stayed there, but chose to lodge in Ilwaco, on the Washington side of the river. Ilwaco is a small town approximately 2.5 miles from Waikiki Beach and king tides in Cape Disappointment State Park. That, of course, meant I needed to cross another long bridge: the 4-mile-long Astoria-Megler bridge.
Dismal Nitch and Station Camp
Once across the bridge, I decided to take a right turn and drive the short distance up the road to Dismal Nitch, near what is now a rest area with short paved trail to a Lewis and Clark commemorative bas relief. “Nitch” is another term for cove. And, oh, it was indeed wretched for them during that stormy autumn. Their leather clothing was literally rotting off their backs, fires were difficult to start and keep lit, they couldn’t go hunting because the waves were too high for their canoes to safely maneuver. Then, in a figurative ray of sunshine, members of the Cathlamets easily crossed over the high waves in their large, wide canoes to sell fish to the Corps.
After a total of six days, the miserable party was able to move from that “dismal nitch” to a place called Station Camp for 10 days before ultimately relocating across to the Oregon side of the river in a forested area that would become Fort Clatsop. There, they would spend a damp and cold but productive winter prior to the beginning of their return journey home.
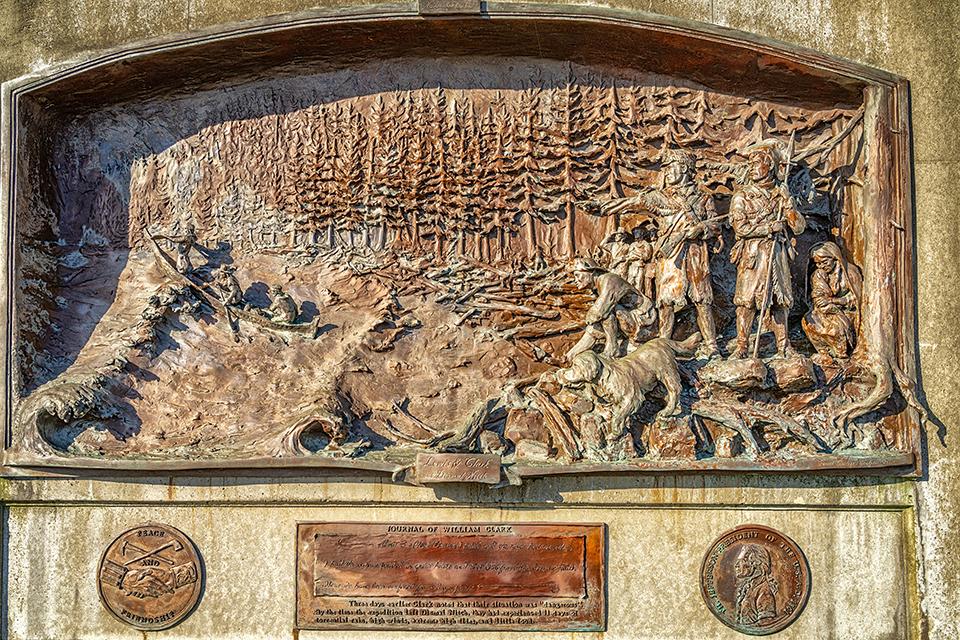
The Dismal Nitch commemorative bas relief, Lewis and Clark National Historic Trail / Rebecca Latson
Depending upon the weather, Dismal Nitch may or may not be so dismal. I photographed the commemorative bas relief west of the rest area parking lot on a lovely, sunny day.

Dismal Nitch on a dismal morning, Louis and Clark National Historic Site / Rebecca Latson
Two days later, I photographed that small cove on a not-so-sunny morning. Use your imagination to picture this small cove without the road or other signs of modernity. You can see the beach (such as it is) backed by a thick forest with a steep uphill angle. I ultimately photographed the entirety of the cove from a dirt pullout alongside the opposite side of the road, prior to reaching the rest area.

A dirt-and-grass road into the forest, Lewis and Clark National Historic Trail / Rebecca Latson
In addition to photographing the cove, I looked around to observe other interesting photo ops. Sure, that dirt and grass road up into the forest is modern, but within that moody composition are trees, vegetation, and colors the Corps would have viewed. This is something for you to remember when traveling a historic route: at whatever mapped stop you photograph (like Dismal Nitch or Station Camp), take a look around and see what else captures your eye. Aside from any modernization, what you see is what those historic figures probably saw.
Resuming my westward drive toward Ilwaco, I passed the parking area for Middle Village / Station Camp. You know you are there when you see the church. I returned to photograph this spot on the morning of my departure for home. Imagine, again, that bit of land without the church or the road or anything else between land and water. A Chinook village of 36 houses once occupied that spot, but the people had already moved to their winter village when Lewis and Clark arrived there in November 1805.
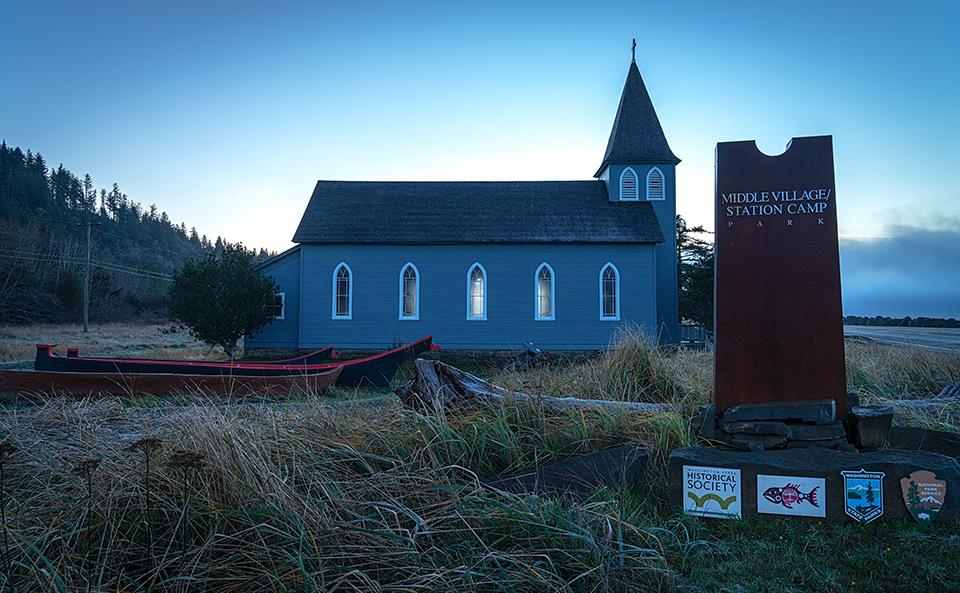
Middle Village/Station Camp Park, Lewis and Clark National Historic Trail / Rebecca Latson
I took an overall photo, including the sign and logos displaying the cooperation between the agencies maintaining that historic spot, as well as to highlight the different cultures occupying that spot at one time or another.

A Chinookan canoe at Middle Village/Station Camp, Lewis and Clark National Historic Trail / Rebecca Latson
The huge, red and black canoes really caught my eye, so I moved in close with a 24mm focal length to capture a different perspective of the entire length of one canoe. You might also notice I added a touch of vignetting to the canoe image, in addition to the Middle Village and Dismal Nitch images. Darkening the top, bottom, sides and corners of an image with a little vignette will focus the eye more on the subject and create a sort of moody glow to the lighter portion of the composition. Most photo editing applications (including Instagram) have a slider or icon for applying a touch of vignette.
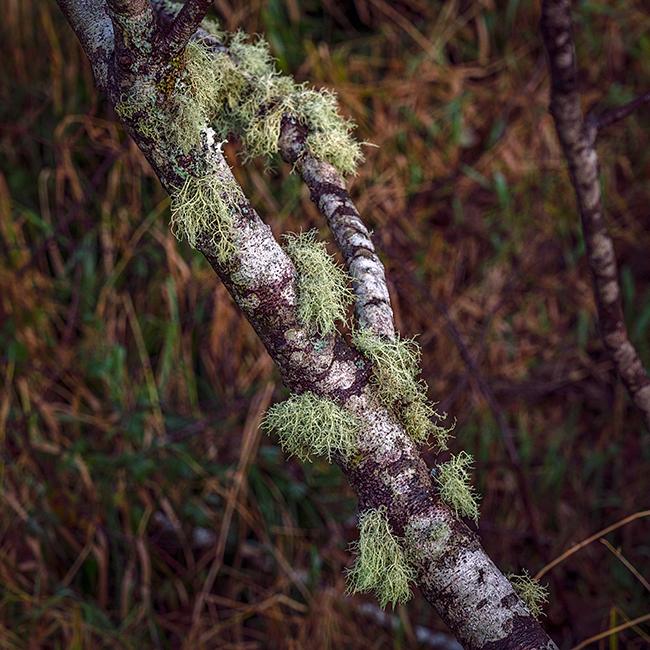
Patches of lichen on the tree, Middle Village/Station Camp, Lewis and Clark National Historic Trail / Rebecca Latson
As I walked along the boardwalk up to a small view area, I noticed splotches of green lichen on the tree limbs. The Corps of Discovery might have remarked upon a similar sight, and it’s another example of observing the environment around you.
King Tide Photography At Cape Disappointment
If you plan on photographing the amazing waves created from king tides at Cape Disappointment State Park, then the first thing you’ll need to do is run an internet search for tide times. I stayed at Ilwaco, so I Googled king tide ilwaco wa and pulled up a king tides calendar for winter of 2021-2022 listing dates and tide times not only for Ilwaco but for other coastal Washington towns, as well. Knowing the months and times helped me plan my trip, reserve lodging, and figure out what time I wanted to depart my room for Waikiki Beach, which is the location for photographing the waves at this state park.

A dark and stormy morning at Waikiki Beach, Cape Disappointment State Park, Lewis and Clark National Historic Trail / Rebecca Latson
Here’s a fun, albeit macabre fact: Waikiki Beach got its name from the discovery of a Hawaiian sailor’s body washed ashore after his ship wrecked while trying to cross the Columbia Bar in 1811. It’s definitely not the Hawaiian beach of white sands and tropical, turquoise water, but rather a small beach with piles of driftwood to which I mistakenly hiked down before realizing it was the jetty I needed to reach, instead. Thankfully, you can drive to a parking lot along the jetty.

Photographing king tide waves along the jetty at Waikiki Beach, Cape Disappointment State Park, Lewis and Clark National Historic Trail / Rebecca Latson
Regarding the Waikiki Beach jetty, here’s a little advice: get there early – even pre-sunrise early, no matter what time the king tides are predicted to peak. If you don’t arrive early enough, you risk not finding a place for you and your camera because of the crowds who begin their day super-early to grab the easy view spots along the jetty. You see, once those easily accessible photo op spots are taken, most of the rest of the jetty edge is protected by piles of huge basalt rocks that might require a little bit of clambering up for a view of the cliffs and lighthouse above the churning water. I don’t know about the rest of the year, but when I went, I not only had those sharp-edged basalt rocks with which to contend, but also large swaths of driftwood. I finally found a spot large enough for me and my camera between other photographers and their tripods, but had I arrived any later, not only would I have missed the sunrise, but I might not have been able to find a clear spot on which to stand for photographing those great, gorgeous waves.
Ok, so now that you and your camera or smartphone are positioned to photograph the incredible waves crashing against the cliffs, here are a few tips for you:
It you take a tripod along, make sure you also have a corded or wireless remote set to continuous shots. When you push down that remote button and hold it, you’ll get a series of rapid-fire shutter clicks. That’s the trick to really freezing those waves. I forgot my remote (I’m glad that’s all I forgot) so I used the tripod for my smartphone, instead, to capture videos. For that, I attached smartphone to tripod with a tripod head (purchased from Amazon) specifically to fit my phone. With that setup, I captured regular, time-lapse, and slo-mo videos.
iPhone king tide wave action time-lapse video, Cape Disappointment State Park, Lewis and Clark National Historic Trail / Rebecca Latson
As you watch the time-lapse video above, you can’t help but notice that green dot in the lower center portion of the video. An issue resulting from pointing a smartphone (or any camera lens, actually) toward the sun is flare in your composition. I’m not a videographer by any means, and I am certain there is a method of removing that from all the frames. I left it there, however, to show the pitfalls of flare on the lens.
While I noticed most of the photographers placed their cameras on a tripod, I handheld my own cameras because I felt I had a greater range of motion for compositions. Hung around my neck was a camera with a 100-400mm lens and another with a 24-105mm lens. Both possess image stabilization and were set to AF-C (continuous focus for movement). It didn’t take me too long to determine when the really big swells approached to create those huge sprays of water against the cliffs. Each time I saw a huge swell and the beginning of a large wave, I kept my finger on the shutter button for many clicks known as the “burst method.”
I kept the ISO high on each camera, experimenting between 1250 and 4000 (I overheard one photographer say he was using an ISO of 8000). High ISOs allow for quite a bit of light onto the sensor. This, in turn, allows the use of high shutter speeds (1/500 - 1/1000) to freeze wave motion and mitigate overexposure form the high ISOs. I played around with the aperture setting too (between f4 and f14).

Sunrise at Cape Disappointment State Park, Lewis and Clark National Historic Trail / Rebecca Latson

Sunrise color and king tide action at Cape Disappointment State Park, Lewis and Clark National Historic Trail / Rebecca Latson
Sunrise was glorious and created colorful compositions. Once the sun rose above and to the side of the lighthouse, though, things got super-bright and super-harsh. One photographer near me commented he could barely make out anything through his lens. So, what to do when that happens? Well, you can either stop for a bit while waiting for the sun to move, or you can change your camera settings. The amazing waves didn’t stop because of the harsh light, and neither did I.

Bright yellow sunlight over the waves, Cape Disappointment State Park / Rebecca Latson
The scene looked for all the world like a bright, old-time sepia-shaded shot. So I switched my settings to a lower ISO, smaller aperture, and kept the shutter speed high. The cliffs were more or less silhouetted because of the sunlight’s angle, and my settings mimicked this to darken the rocks and shade the waves enough to bring out more of the water’s texture.
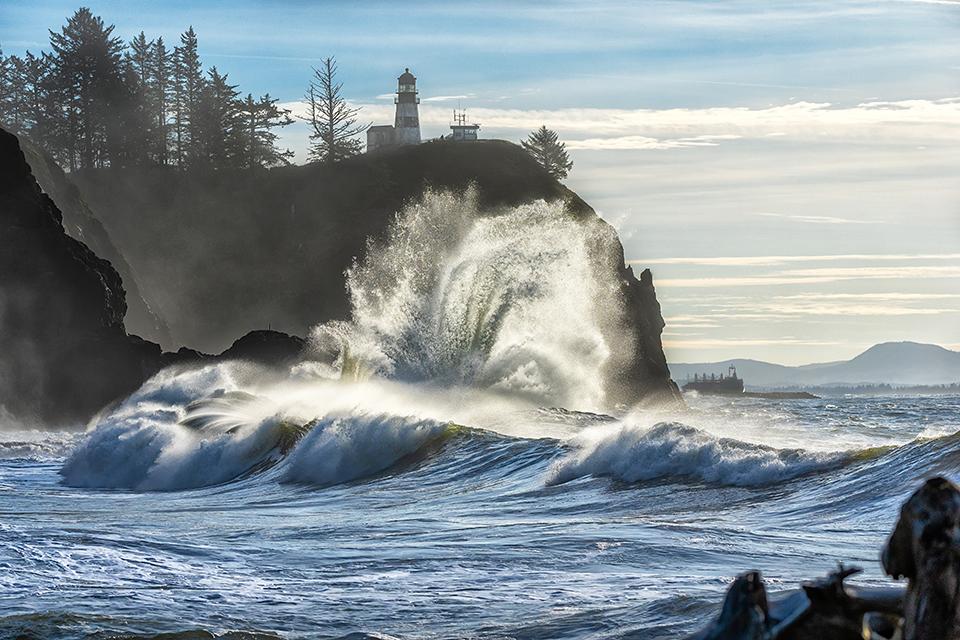
A ship on the river and waves on the cliff, Cape Disappointment State Park, Lewis and Clark National Historic Trail / Rebecca Latson
Even as the yellow light diminished in favor of whiter light, I kept up the shutter clicking. This experience was yet another example of why you should always stick around maybe 15 minutes longer than you might initially want to, or revisit a spot during different days, seasons, and times. You’ll be surprised at how much the same scene will change, all due to the light.
Note: the use of a high ISO means your images will probably look on the grainy side. Use of a noise reduction application, like Imagenomic, Topaz DeNoise AI, Nik Collection Dfine 2, or any number of other noise reduction software out there will mitigate the graininess.

Crashing waves and bright sunlight rendered in black-and-white, Cape Disappointment State Park, Lewis and Clark National Historic Trail / Rebecca Latson
Once I returned home, I did something else you might think about while editing your own images of high waves: I converted the shot to black and white. To paraphrase a photographer I follow on Flickr (Hilton Chen): removing the color focuses your eye on “lines, shapes, forms and tones that hold the image together.” I feel monochrome compositions highlight textures and bring out the nuances of light and dark that might otherwise be overlooked because of the colors.

It was a dark and stormy morning at Cape Disappointment State Park, Lewis and Clark National Historic Trail / Rebecca Latson
I awoke the following morning to a completely different day: windy, cold, very rainy. As I stood in the windy cold in my fleece covered by a Gore-Tex rain jacket, tilting my head to one side to drain the rainwater collecting on my Gore-Tex rain hat, I thanked the 21st century for such modern luxuries that Lewis, Clark, and the rest of their freezing, wet, disgruntled crew would not have been able to access. This was the kind of day they probably experienced back in November 1805.
After standing on a wet, slick driftwood log for about an hour, photographing waves not too much larger than when I first arrived, I decided to pack it in and pay a visit to the Lewis and Clark Interpretive Center high on the cliff across from the Cape Disappointment lighthouse. If you decide to visit this place utilizing your Google Maps or other GPS system, be aware that you’ll probably be directed to the first right-hand turnoff up to the interpretive center. Don’t take that first right. There are limited spaces specifically for employees and disabled parking, only. Instead, keep on the main road that ends at a much larger parking lot with a short, paved trail up to the interpretive center. It’s free to enter and wander the shop and observation area with its huge picture windows, but I encourage you to pay that extra $5 fee to stroll through the museum/interpretive portion of the center.

A windy, stormy view of the Waikiki Beach jetty from the Louis and Clark Interpretive Center, Cape Disappointment State Park, Lewis and Clark National Historic Trail / Rebecca Latson
This is the last installment – for now - of my Washington state exploration of the Lewis and Clark National Historic Trail. If you are just now joining me on this expedition, you might want to catch up with my first and second columns. If you are considering your own explorations of this NHT, check out the Traveler’s July 2021 article about the latest website “designed to help you learn more about the host communities, local businesses, and attractions located along the 4,900-mile trail.”
The more I explored the Pacific Northwest portion of the Lewis and Clark NHT, the more I realized there is so much to learn (and photograph) from the places and sights along the footsteps of history on a national historic trail. More and more, I am considering changing my current 2022 photo travel plans in favor of continuing this NHT journey further east in Washington and into Idaho and Montana. Stay tuned.

A precarious perch on a dark and stormy day, Cape Disappointment State Park, Lewis and Clark National Historic Trail / Rebecca Latson
To visit Washington state parks, you’ll either need to purchase an annual Discover Pass for $30, or you can fill out a day pass and pay $10. FYI, if you don’t have a pass and get caught, the resulting ticket can be pricier than the cost of an annual pass ($59 to $99). More than one ranger stopped at the Waikiki Beach jetty while I stood there and would periodically use a loudspeaker to describe a particular vehicle and request the return of that vehicle’s owner.
References
Anthony Brandt (Editor), The Essential Lewis & Clark, 2002, National Geographic Partners, LLC
Stephen E. Ambrose, Undaunted Courage | Meriwether Lewis, Thomas Jefferson, And The Opening Of The American West, 1996 (2005 paperback edition), Simon & Schuster Paperbacks


 Support Essential Coverage of Essential Places


Comments
Very nice article and photos Rebecca. Thanks for taking the time and making the effort to put it together.
The Field Brothers were related to me via their sister