A view toward the dining room, Old Faithful Inn, Yellowstone National Park / Rebecca Latson
Digital cameras capture pretty much all the data, but sometimes you must tease out the subtleties of light and shadow, color, texture, and pattern from that data on your memory card – especially if it’s an image photographed under low-light circumstances. And just what would those circumstances be? Well …
How many of you have packed your camera and overnighted within the warm, log-hewn enclosure of a rustic historic park lodge?
How many of you have visited a national historical park or historic site, camera in hand, roaming through room interiors, each telling a story of the associated historic personage or event?

Fort Clatsop barracks room, Lewis and Clark National Historical Park / Rebecca Latson
How many of you have wandered with your camera into a green-shadowed, sun-dappled forest realm of trees, ferns, and moss?

Moss-draped limbs in a lowland interior forest, Mount Rainier National Park / Rebecca Latson
How many of you have lifted your gaze skyward, aiming your camera at the inky, star-studded night blanketing the landscape of a unit within the National Park System?

A pre-dawn sky at Reflection Lakes, Mount Rainier National Park / Rebecca Latson
Before I ever conceived of photographing a dimly-lit building interior, I found myself on the losing end of capturing dimly-lit forest interiors. And I had yet to entertain the idea of night sky photography, although I tried photographing the starry night sky from my lodge room window during a 2009 trip to Glacier National Park, with non-stellar results.
Fast forward to 2023. I’ve learned a few things over the years, including the discovery that, indoors or outdoors, the basic formula for achieving successful low-light imagery applies to forest, building interior, and night sky shots, alike.
If you read my Traveler article about seeing the forest for the trees, you’ll know not all forests are alike. However, most of them have one thing in common: shaded interiors. While slices of sunlight might stream through openings within the tree canopy, forest interior photography is really a shadowed affair requiring higher ISOs, wider apertures (f-stops), and slower shutter speeds (especially if handholding to prevent camera shake blur). Tripod usage offers the advantage of lower ISOs and smaller apertures while applying really slow shutter speeds without those camera shake blues and “noisy” outcomes (more about that, later).

Sunlight and shade along the Twin Firs Trail, Mount Rainier National Park / Rebecca Latson
Tripods also offer another slow-shutter advantage regarding photographing flowing water in a shadowed landscape: successful silky water shots.

The silky waters of a Westside Road waterfall, Mount Rainier National Park / Rebecca Latson
What about using flash to brighten the darkness? Some photographers do use a flash for extra light, called “fill flash,” but that’s generally to freeze motion, eliminate noise, and highlight colors close-up of an insect, amphibian, reptile, bird, or mammal. A blog post by Gregory Basco of deepgreenphotography.com provides a nice explanation of fill flash for nature photography.
Whether photographing a forest or a lodge lobby, attune your eyes to the subtle balance between light and shadow. You could expose for the shaded areas in order to lighten/brighten the dark scene, but you risk overexposing (“blowing out”) the brighter portions of a sun-flecked forest or lamplit lodge room. If you blow out the highlights (the brights in your image) then you will have lost details that can’t be regained. Instead, try exposing for the bright portions of your composition. You won’t blow out highlights and lose detail and it’s much easier to lighten up those shadowed areas than vice versa during the editing process, imo.

Looking down on a lobby at the Ahwahnee Hotel, Yosemite National Park / Rebecca Latson
I don’t want to leave you point-and-shoot or smartphone users out of this conversation. Non-SLR cameras may not possess as many bells and whistles to finesse that light/dark balance, but they still do a nice job of capturing the scene. Point-and-shoot and smartphone camera users can access certain modes or apps either in-camera or on computer to improve details within a dimly-lit composition.
I mentioned night star photography earlier in this column. The Milky Way or a full moon over an iconic national park landscape is quite the sight. You may have scrolled through amazing night images on a website like Flickr and seen clear, bright details of “The Mountain” in Mount Rainier National Park or The Watchman in Zion National Park or Delicate Arch in Arches National Park at night, with the Milky Way against a truly dark sky. Don’t be fooled, though, into thinking that’s what you and your camera will see at oh-dark-thirty on a moonless night. Those photos are usually a composite of two or more shots of the same scene captured during different times of day, then blended into a single image displaying the best of both landscape and night sky.
You can also “light paint” a nearby rock formation or building when photographing the night sky. Light painting means, essentially, shining a flashlight or other light source on a landscape feature while the camera’s slow shutter speed ticks off the seconds.

The night sky over Owachomo Bridge, Natural Bridges National Monument / NPS - Jacob W. Frank
Most photographers take what they are given on a starry or full-moon night and capture the scene without composite blending or light painting, then do a little lightening and brightening during the editing process. Do you see the complete bright details of whatever landscape there is beneath the Milky Way? Probably not, but the view is a little more realistic and every bit as stunning.

The Milky Way over "The Mountain," Mount Rainier National Park / Rebecca Latson
However you choose to capture your night image, just remember the same things apply to getting the shot for the Milky Way as they do for a room or forest interior: a tripod (a requirement for that shot, actually), wide aperture, higher ISO (between 1600 and 6400+), and much slower shutter speed (anywhere from 10 to 30 seconds). And, to capture a wide swath of sky and stars, you’ll also want a wide-angle to ultra-wide-angle lens (17mm to 11mm), or use the wide-angle setting on your smartphone or point-and-shoot.
Now, while I’m not going to go into the weeds about low-light editing techniques, I am going to write a little bit about "noise,” because almost every low-light photo you capture will contain some degree of noise, which is the name given to the little grains of pink, green, yellow, and white you see in a photo upon use of a really slow shutter speed, wide aperture, high ISO, or a combination thereof.
If you are capturing imagery mainly for the small screen (think Instagram) and not for a ginormous enlargement for your living room wall, then you don’t need to concern yourself too much with low-light noise because a smartphone-sized, or even iPad-sized image probably won’t display those grains. Nonetheless, knowing how to counteract that graininess is certainly useful and easy. There are all sorts of noise reduction software apps out there, including Imagenomic Noiseware, Topaz Denoise AI, On1 NoNoise AI. Each of these apps allow you to add as much or as little noise reduction as you wish.
Below is a close-up comparison of a noisy image versus one to which a little noise reduction was applied. It’s the same image as shown elsewhere in this article. Now, I know you are thinking there’s not really much difference. I was conservative in my grain reduction application, but when the image is viewed as a whole, even that small amount of reduction is helpful.

Noise (left image) versus noise reduction (right image) / Rebecca Latson
Every photo you capture of your experience in a national park fleshes out that visit for yourself and your viewing audience. That national park photo story should include a few low-light shots of your explorations through a shadowy forest interior, or around the spacious lobby of a rustic park lodge, or gazing upward toward the Milky Way on a clear, moonless night outdoors. Hopefully, this article will point you in the direction of learning the art of capturing a well-composed low-light indoor or outdoor landscape. Go out, experiment, and see what happens. The more you practice at something, the better your results.
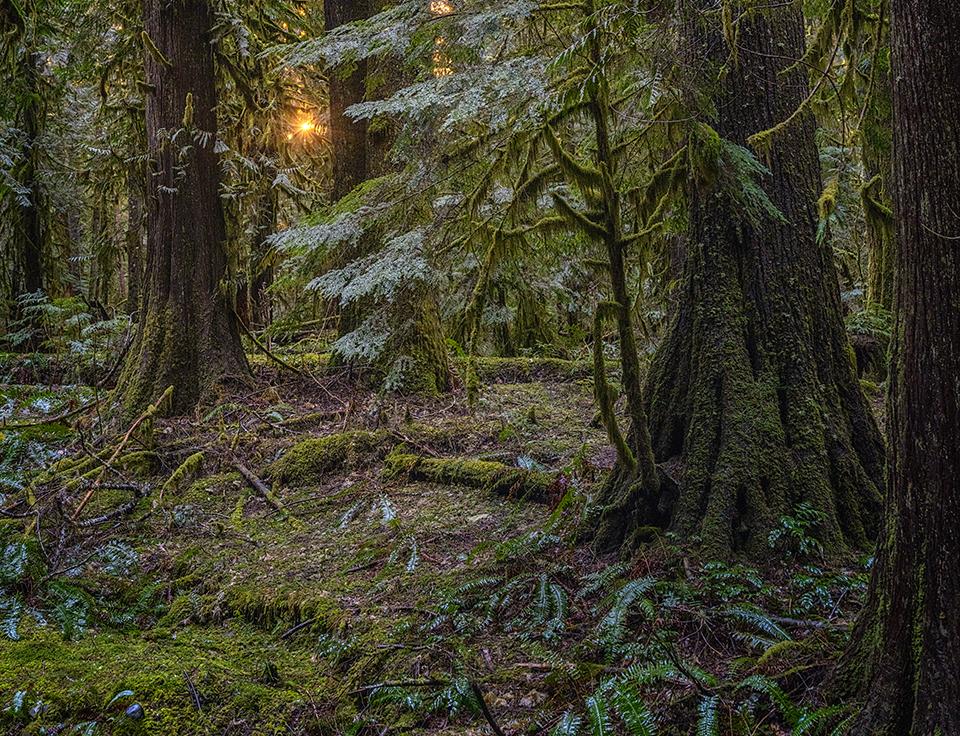
Sunlight peeking through the trees, Mount Rainier National Park / Rebecca Latson