A star-studded early morning over Reflection Lakes, Mount Rainier National Park / Rebecca Latson
“Half the park is after dark,” as the saying goes. International Dark Sky Week 2021, timed to greet April’s new moon beginning on the 12th, when “the sky is darkest and the stars most visible,” is not only a celebration of these vast, wondrous starry skies and our ability to still see them, but a venue on which to explain light pollution and its negative impacts of hampering our ability to clearly see the stars at night, but the harm it causes to all living things.
A number of park units within the National Park System have been designated International Dark Sky Parks (IDSPs). To be awarded that distinction by the International Dark-Sky Association, the land must possess “an exceptional or distinguished quality of starry nights and a nocturnal environment that is specifically protected for its scientific, natural, educational, cultural heritage, and/or public enjoyment. The land may be publicly owned, or privately owned provided that the landowner(s) consent to the right of permanent, ongoing public access to specific areas included in the IDA designation.” You can click here to find and read about each of these IDSP units, which include not only national parks, but other protected lands such as national monuments and state as well as international parks.
The Traveler has featured dark skies not only in Podcast Episode 6, with an interview of “The Dark Ranger” Kevin Poe, to discuss the starry skies over the National Park System, but also as a Traveler’s 2nd Annual Threatened and Endangered Parks article by contributing writer Kim O’Connell, who detailed the harmful effects of both light and noise pollution.
And of course, nothing captures a memory of a dark, starry sky over a national park more than some night sky photography - especially if some celestial event is taking place, like a meteor shower or a comet making its stately way across the night sky.

The comet NEOWISE over Crater Lake National Park / Rebecca Latson
There are a number of books written about the subject, and the Traveler’s own Patrick Cone wrote a review of Jennifer Wu’s and James Martin’s Photography Night Sky: A Field Guide For Shooting After Dark.
I’ve offered tips and techniques for night photography in several Photography in The National Parks monthly columns, and former Traveler contributing photographer Deby Dixon wrote a 2013 article about night photography in Grand Teton National Park.
If you decide you want to try your hand at some nighttime photography while visiting a park unit, here are a few tips.
- Use a tripod – nothing says “blurry image” more than handholding a camera while trying to photograph the night sky.
- Use manual focus – after the sunlight goes away, your camera’s auto focus system won’t find anything bright enough to focus upon. From personal experience, I can tell you not even the stars work well for auto focus.
- Use a wide-angle “fast” lens – 14mm, 16-35mm, even 24mm or 24-70mm lenses work well, because they are not only wide enough to capture a great deal of starry sky, but they are probably also “fast,” meaning they have a maximum aperture opening of anywhere from f1.2 to f2.8. When you “open a lens up wide,” that means you are using that maximum f-stop (the smaller the f-stop, the wider the lens opening).
- Use a corded or wireless remote shutter release or your camera’s 2-second timer – even the touch of your finger as you push down on the shutter button will create a little camera vibration, which in turns adds blur to the image.
- Use a high ISO – anywhere from 640 on upward.
- Use a slow shutter speed – anywhere from 5 seconds to 30 seconds and beyond (bulb).
- Try blending two (or more) different images – one exposed for the landscape during a slightly lighter part of the day, and another exposed for the night sky. More often than not, a starry night image you oooh and ahhh over is a composite of more than one image, and an honest photographer will mention it as such. For example, you’ve probably seen stunning star shots of Zion National Park’s Watchman and Virgin River, where the mountain and river are nicely highlighted with the Milky Way overhead. In truth, it’s much darker than what you see, as shown by my own night image of the location taken around 2 a.m. on a crisp, clear, February morning.

A starry sky over the Watchman and Virgin River, Zion National Park / Rebecca Latson
- Make use of that light pollution - more often than not, light pollution works against getting a perfect night image, but I’ve noticed some images on the photo site Flickr.com, where the photographer has mentioned using the light pollution to highlight the landscape below the stars. I used it to highlight the disparity between the night sky and artificial light (and light trails) created by cars in the Sunrise parking lot at Mount Rainier National Park.

A busy summer night in the Sunrise area, Mount Rainier National Park / Rebecca Latson
- Do a little light painting. Ok, as for light painting, I’m personally not a fan of it, but I see it utilized quite a bit in night photos. Here’s a note about light painting: depending upon which national park unit you are visiting, you might not be permitted to light paint. As of 2020, there are currently four Utah parks where light painting – even low-level landscape lighting – is not permitted: Arches and Canyonlands national parks, and Natural Bridges and Hovenweep national monuments. I found an interesting 2018 question-and-answer blog post about this subject by National Parks At Night, which offers tours and how-to guides regarding night photography.
So, this week in particular, but also on any other clear, dark night in a national park or even when you are at home, take a moment away from the smartphone, laptop, iPad, and television to go outside to gaze up at the night sky (if the weather is decent). Celebrate the ability to see the vast, unfathomable panorama of twinkling stars and the Milky Way.

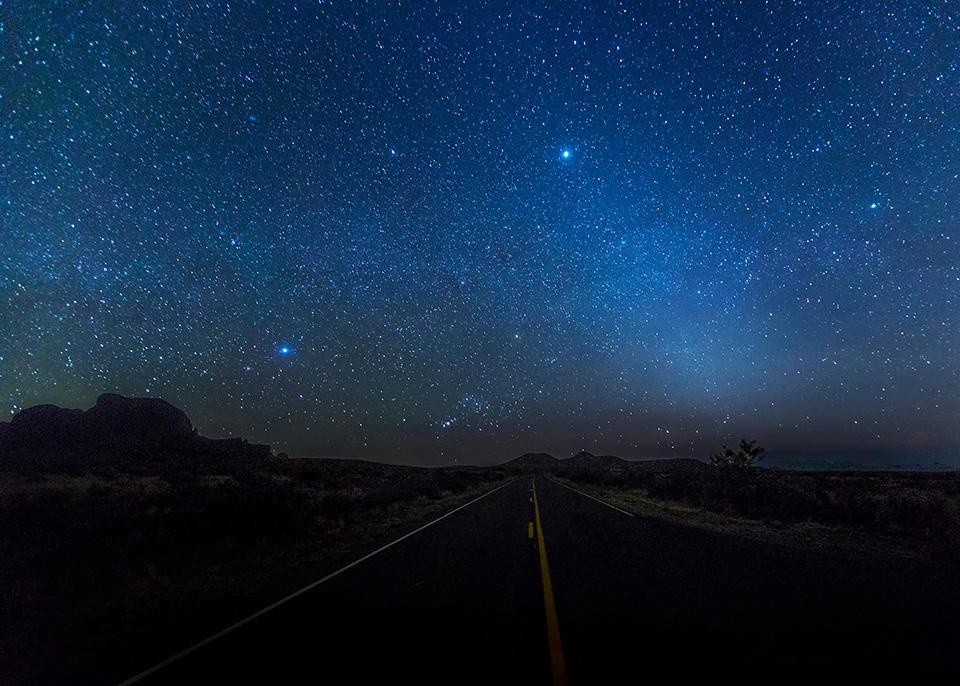
The road to the stars, Big Bend National Park / Rebecca Latson


 Support Essential Coverage of Essential Places


