
Brown pelicans in flight, Padre Island National Seashore / Rebecca Latson
This past April, I decided to take a little weekend road trip to the beach: Padre Island National Seashore. Leaving behind the bathing suit, I instead picked up my cameras for some bird and beach photography. I returned home with a sun-kissed face and some really neat photos.
Padre Island is a little over three hours’ drive southwest from my home in Texas. As I planned my weekend trip, including lens choices, I also considered ways to keep my precious gear free from the vicissitudes of blowing sand and sea-salty air. Based upon my experiences during this trip, I have provided 21 tips to help you make the most of your own photography during your visit to this wonderful Texas national seashore.

A wide-angle view from the Malaquite Visitor Center, Padre Island National Seashore / Rebecca Latson
Tip #1: Prepare and plan. What are you going to do while there? Padre Island is a magnet for birders, but do you solely want to focus on the birds, or do you think you might capture a few wide-angle landscape shots as well? I knew I would do both, so I packed lenses to accommodate those aims.

Cactus on the coastline, Padre Island National Seashore / Rebecca Latson
Tip #2: Whenever you can, use your lens hood. This mitigates the chance of sand blowing onto or across the lens glass, or getting caked onto your lens as the camera hanging from your neck dangles dangerously close to the sand when you bend down to inspect something interesting washed in by the tide (ahem).
Tip #3: Use zoom lenses as much as possible so you won’t require a lens change while on the beach. If you have a backup camera in addition to your main one, then take both and attach a different lens to each body.
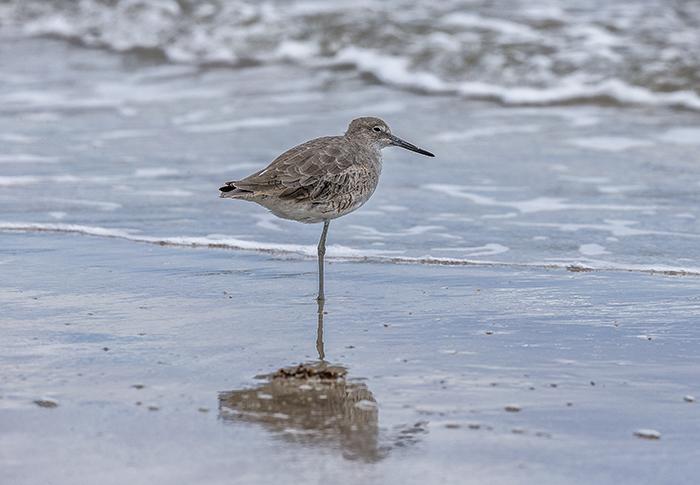
Willet, Padre Island National Seashore / Rebecca Latson
Tip #4: Keep the lens covers affixed to each lens when not in use.

Laughing gull, Padre Island National Seashore / Rebecca Latson
Tip #5: Eliminate some of the sun’s blinding reflection off the waves with a polarizing filter, which will also enhance color saturation to the water and sky, and add texture to any clouds.
Tip #6: Occasionally, try using your telephoto to capture landscape images. There might be times when the birds are just too far away for a good head shot, but you can still incorporate them into the overall composition. I wrote an article about telephoto lenses and landscapes a few years ago.

Just another day at the beach, Padre Island National Seashore / Rebecca Latson

Brown pelicans fishing for breakfast, Padre Island National Seashore / Rebecca Latson
Tip #7: After a day at the seashore, inspect and wipe down your cameras and lenses with a clean, damp towel followed by a clean, dry towel. Unless you need to do an emergency wipe-down in the car because something awful/stupid happened while out on the beach, just wait until you’ve returned to your room, tent or camper (yes, there is camping out at Padre Island). Think about packing something like the Giottos Rocket Air Blaster. It's a dust-removal tool consisting of a black bulb you squeeze, forcing a burst of air through a tube to blow off any dust, grit, or sand from parts of your camera and lens. It works considerably better than simply blowing on your lens with your breath, as it’s easier to direct the air bursts and avoids vapor droplets. Also, pack a microfiber lens cloth and/or some packets of pre-moistened lens wipes like the Zeiss-brand wipes I order from Amazon. I dropped my grad ND filter onto the beach during a sunrise photo shoot, and those wipes sure came in handy.

A willet's morning breakfast run, Padre Island National Seashore / Rebecca Latson
Tip #8: When photographing birds, remember, they are constantly moving. Set your camera to AI servo mode, or whatever your camera brand calls the mode that tracks and focuses on moving subjects.
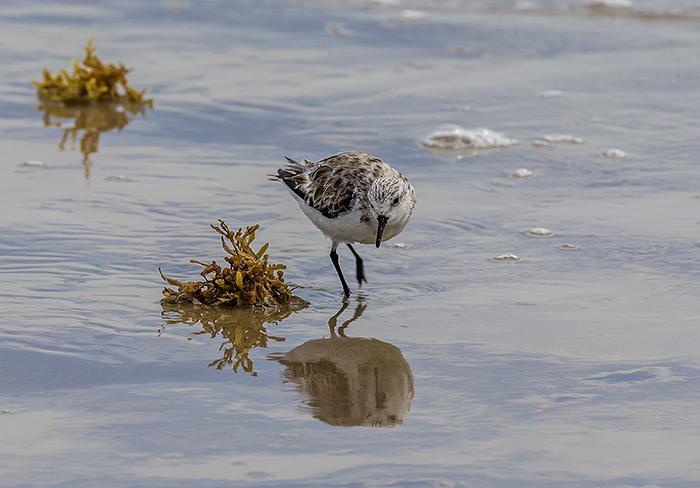
Sanderling, Padre Island National Seashore / Rebecca Latson
Tip #9: Again, birds are constantly moving, so bump up your camera’s ISO. The higher the ISO, the higher you can set your shutter speed to freeze the motion of your subject. During the darker early-morning hours, I experimented with ISOs between 1,000 and 5,000. Later, I lowered the ISO to 400 or 640 because the sun was so bright.

A couple of Sandwich terns, Padre Island National Seashore / Rebecca Latson
Tip #10: Take water and food. You’ll need both, because walking even the packed sand near the tide takes some effort, even if you don’t initially feel it. You’ll get hungry and definitely thirsty as the wind and salt air dehydrate you. Prior to entering this national seashore’s boundaries, you might stop at a grocery store to pick up a few items for the cooler because the only place to get anything to eat or drink is from the vending machines at the Malaquite Visitor Center. Oh, and please don’t feed the wildlife.
Tip #11: Even when overcast, the threat of sunburn exists, so it goes without saying that you should wear sunscreen on any exposed parts of your skin. In terms of clothing, I advise wearing a hat, long sleeves, and lightweight pants. Walk in sturdy shoes you won’t mind getting wet. Forget about going barefoot, as you run the risk of stepping on broken shells or other sand-covered sharp debris. Don’t wear flipflops either, as it’s too easy to lose one.
Tip #12: Padre Island National Seashore faces east/southeast, so you'll have the chance to capture amazing sunrises during your stay. For those wide-angle sunrise (or sunset) shots, use your tripod and graduated neutral density (grad ND) filter to equalize the brilliance of the bright sky against the darker shoreline. A grad ND filter also adds texture and drama to any cloud cover. For those of you who may be curious as to what I utilize, my grad ND filter of choice is a Lee-brand 4x6, 0.9 soft-edge filter, which I hand-hold against the lens. Yes, there are filter holders, but I like hand-holding because I can move the filter up and down more quickly. Of course, the caveat is that it's easier to accidently drop the filter.
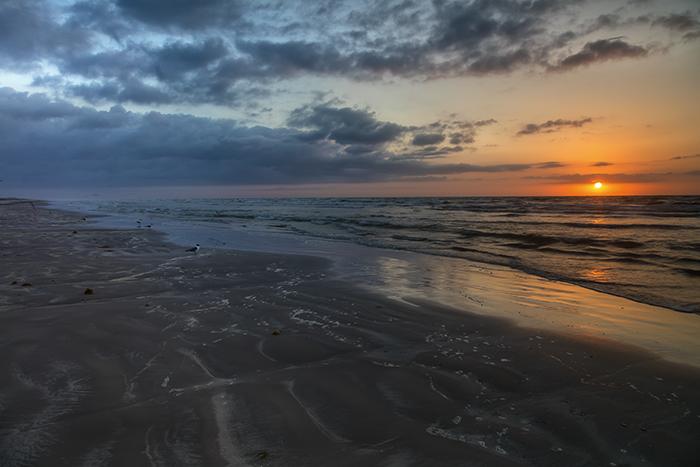
Sunrise at the seashore, Padre Island National Seashore / Rebecca Latson
Tip #13: Use a headlamp for your night and pre-dawn trips to the beach so as to not only keep from falling into sandy holes dug by beachgoers during the day, but also to spot the busy little ghost crabs skittering around. Your light will freeze them on the spot long enough for a photo or two before they race away to their safe, sandy holes. A headlamp works better than a flashlight because it’s easier to hold your camera with both hands for the photo. Use the light of the lamp in lieu of a flash on your subject. Remember to increase your ISO as high as 5,000, and then apply a little noise-reduction software when editing the image later to eliminate the graininess (“noise”) of the composition.

A headlamp sighting of a ghost crab during the wee morning hours, Padre Island National Seashore / Rebecca Latson
Tip #14: For heavy telephoto lenses (like a 500mm, 600mm, or 800mm), you can’t beat a tripod – particularly a gimbal-head tripod allowing easy, smooth movement up, down, and sideways as you pan your camera to photograph that large brown pelican flying overhead.

Brown pelican overhead, Padre Island National Seashore / Rebecca Latson

Itty bitty ghost crab (approx 3 inches long), Padre Island National Seashore / Rebecca Latson

A sargassum nudibranch washed up by the tide, Padre Island National Seashore / Rebecca Latson

A lightning whelk egg case, Padre Island National Seashore / Rebecca Latson
Tip #15: Walk slowly. Take your time. Be observant. You never know what you might find on the sand. In addition to birds, I spied a beached sargassum nudibranch, a lightning whelk egg case, sea whips, and ghost crabs. If you see something you don’t recognize, take a photo and show the knowledgeable staff at the visitor center. They helped me identify the egg case and showed me examples of other items I might find along the beach, like the shell from a speckled crab. Speaking of shells, while most national parks prohibit the taking of rocks, minerals, or other things within the park boundaries, it’s fine for you to pick up uninhabited shells along the beach for your personal collection.
Tip #16: Don’t focus on just the birds or the beach. Flowers bloom year-round, and you’ll spot prickly pear, firewheel (aka Indian basket), scarlet pea, common sunflower, and morning glory, to name a few. Look for wildlife too. You might glimpse a coyote, a spotted ground squirrel, or a rattlesnake (yes, watch your step out at the seashore beyond the beach area).

Morning glory, Padre Island National Seashore / Rebecca Latson

Common sunflower, Padre Island National Seashore / Rebecca Latson

Prickly pear cactus bloom, Padre Island National Seashore / Rebecca Latson
Tip #17: If you vacation at this national seashore during the spring, keep your eyes open for nesting sea turtles. Padre Island is home to five species of sea turtles that are federally listed as threatened or endangered. You can read about them and the work being done to save them on the seashore’s sea turtles page. There is a turtle hotline for you to call if you are fortunate enough to find a turtle laying her eggs. The Sea Turtle Patrol will come out to rescue the eggs from predators like coyotes, ghost crabs, seabirds, and fire ants, then later release the hatchlings back to the sea. Click on this link for more information on what to do if you spot a sea turtle or if you want to witness a hatchling release.

Sea Turtle Patrol, Padre Island National Seashore / Rebecca Latson
Tip #18: To photograph the more remote portions of the seashore, take Park Road 22 past the Malaquite Visitor Center to where the pavement ends and the sand begins. You’ll have 60 miles of beach to drive and explore. Because of the remote conditions, a 4-wheel-drive vehicle is advised, particularly after Milepost 5. The rules of the road apply to driving on the beach just as they do the asphalt highway, and you should be extremely mindful of other vehicles, pedestrians, and nesting turtles.
Tip #19: The best time for visiting Closed Beach, where driving is not permitted (Malquite Beach is a part of Closed Beach), and finding few-to-no people is prior to 9 a.m. and later in the evening.
Tip #20: Just as you do when hiking in the forest, mountains, desert, or plains, whatever you pack in, please pack out. The photo of the bottles below with those little diamond-shaped holes indicate a sea turtle took bites out of the plastic. The turtle might or might not have ingested the plastic, but either way, litter has no place in this national seashore, or anywhere else, for that matter.

Sea turtle bite holes, Padre Island National Seashore / Rebecca Latson
Tip #21: While at Padre Island National Seashore, take time to chat with the park staff, listen to one of the talks held at the visitor center, or reserve a spot on a guided birding walk with a ranger. You’ll learn something new about the shore environment and its denizens. Above all, enjoy your trip to the beach and return home with a sun-kissed face and some really neat photos.
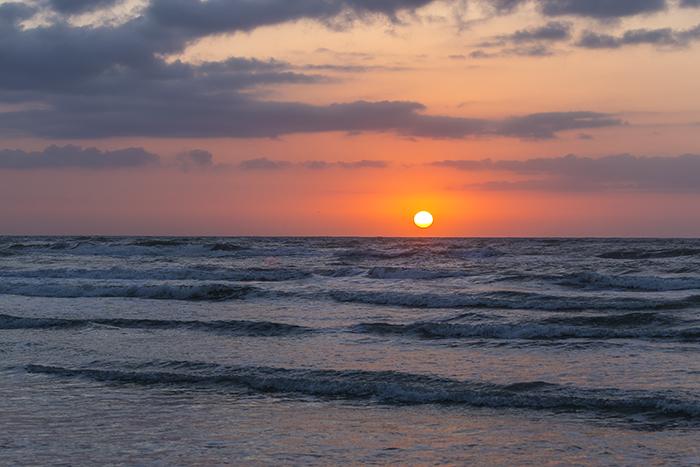
Sunrise over the Gulf of Mexico, Padre Island National Seashore / Rebecca Latson


Comments
Nice!
I hope that when I finally grow up, I'll be as good at photography as you are, Rebecca.
Beautiful stuff. I especially like the shots of brown pelicans in flight.
Beautiful pictures, as usual, and great tips! Good job, Becky!
Thanks so much, Lee! You are too kind.
Thank you, Rick B. The pelicans in flight were the easier ones to photograph (easy being relative). They look so stately when in the air, and somewhat prehistoric, too.
Thanks, Sheila! Much appreciated!
I agree, Rebecca. One of my own favorite bird shots I have [in Alaska we volunteer with the Christmas Bird Count and with Raptor rescue] was a blue heron in flight. I have to admit it was purely a lucky shot.
Thanks for this article, Becky. I've considered going to Padre numerous times, but I've never followed through. I'll put this on my list of places that I must visit.