
Cliff dwelling, Mesa Verde National Park / Rebecca Latson
If you’ve read any of my three previous armchair guides (Glacier National Park, Arches National Park and Big Bend National Park), then you’ll know this particular photography guide to Mesa Verde National Park is for those who want to capture cool photos of the landscape and cliff dwellings but are not able to, or don’t have the desire to, hike long backcountry trails to hidden ruins or traverse steep trails (paved or gravel) and then climb up ladders to get to their photo op. The question becomes, though, is it difficult to really photograph details of cliff dwellings at this park without climbing up some ladders?
Let’s find out.
Oh, lest you think otherwise, this national park also affords plenty of opportunities for stunning landscapes as you’ll see in this armchair guide.

The Mancos Valley as seen from the Mancos Valley Overlook, Mesa Verde National Park / Rebecca Latson
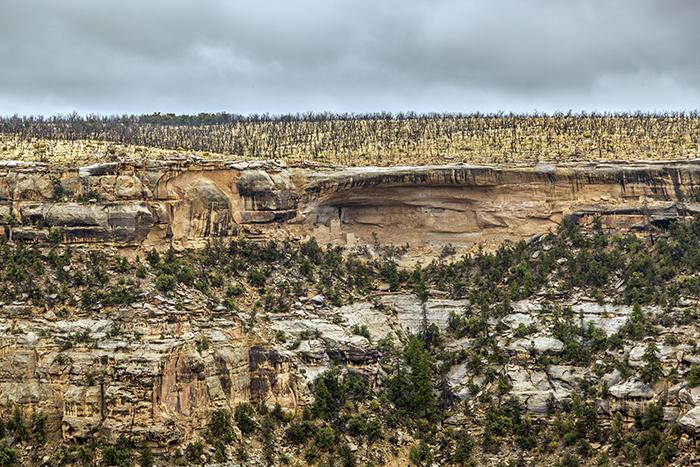
Ruins across the canyon, Mesa Verde National Park / Rebecca Latson
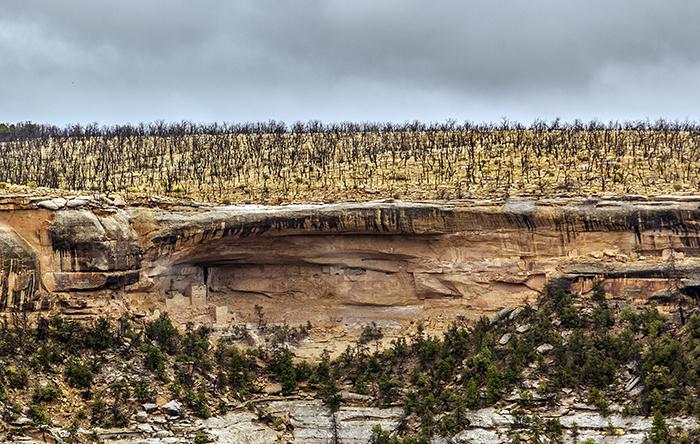
A telephoto view of ruins across the canyon, Mesa Verde National Park / Rebecca Latson

Ruins across the canyon, Mesa Verde National Park / Rebecca Latson

A telephoto view of ruins across the canyon, Mesa Verde National Park / Rebecca Latson
Equipment & Advice
First, let’s check your equipment. Whatever kind of camera you use, make sure it has a nice zoom function as it’s essential within this particular national park. If you use a SLR (a camera that allows for interchangeable lenses), then use a telephoto. Zoom telephoto lenses give you a better choice of focal lengths like 70-200mm, 28-300mm, 100-400mm, or even 24-105mm. The images above give you an idea of 1) just how far away a cliff dwelling is across the canyon in relation to the view area at which you stand, and 2) just how close you can zoom in to a cliff dwelling far across the canyon when you use your point & shoot’s telephoto setting or a telephoto lens on your SLR.
As you can also see from the images above, there is a marked contrast between the very light-colored canyon rock (sandstone and shale) and the dark green of the vegetation as well as the shadowed alcoves in which the cliff dwellings reside. It’s a bit problematic, so to be honest, you’ll probably be doing a little work during the photo editing stage to lighten up those shadowed areas. Nonetheless, to even out the bright horizon (the sky) and keep it from being blown out (overexposed), bring along your graduated neutral density filter (grad ND). Keep handy your circular polarizer for landscape shots, as well, to make the colors pop and give any clouds in the sky a bit of drama.
One more piece of advice before we get into the park proper: many of these images show a straight-line horizon dividing the sky from the flat-topped land below. Unless you are going for an artsy / avant garde look to your composition, take care to maintain that straight horizon line. You can always fix this issue during the photo editing stage, but it’s one less editing step for you if you work with this in-camera. If your tripod doesn’t have a built-in level, you can purchase one to fit on your camera’s hot shoe (the top of the camera where your flash goes). Just go to someplace like bhphotovideo.com or adorama.com and type “camera level” or “tripod level” in the search box.
The Park

Land of the Ancestral Puebloans, Mesa Verde National Park / Rebecca Latson
Mesa Verde National Park is a place dedicated to the display and preservation of those amazing cliff dwellings and other non-cliff ruins inhabited by the Ancestral Pueblo people who lived there for over 700 years. This is one of those national parks where it’s actually pretty cool to photograph scenes where humans have left their architectural footprint. I’ve written more than once where items from human civilization often give a sense of scale and reference to a landscape composition. This time around, it is nature’s cliffs and landscape that give a sense of scale and reference to the dwellings around and within the area. Many of these cliff ruins were built in locations with access to which I still can’t figure out.
It’s a dry country around here, as the Ancestral Puebloans well understood. You should understand this too, and make sure you have plenty of water with you, whether you are driving or hiking. Watch the trail ahead and around you, as well, since snakes (venomous and non-venomous) like to sun themselves in the morning hours. I recall scaring myself and the poor harmless little snake at my feet once, because I didn’t notice it until I was almost upon it. I learned that day, I could jump in the air quite high, camera backpack and all. I also learned that day that snakes can slither away at great speeds.
I first visited this unique national park for a single day back in the fall of 2011 during a 9-day tour of Colorado. The weather was lousy, almost all of the landscape view areas were fogged in and the quality of the areas with visible cliff dwellings was a little hazy as well. That being said, I still came away with some neat shots and a desire to return to this park for a longer visit. In August 2012, I returned to Mesa Verde National Park for a 5-day stay.

Point Lookout, Mesa Verde National Park / Rebecca Latson
Stop 1: The paved pullout just past the park entrance for a view of Point Lookout – From this area, you can achieve a nice wide-angle view of Point Lookout and the road beneath it, or you can zoom in on the layering of sandstone and shale for a nice geology shot. As you’ll note in the image above, there is a difference in the bright sky and the darker landscape. If you expose for Point Lookout, then use your grad ND to keep the sky from becoming too overexposed. If the sky holds lots of interesting cloud formations, then you’ll perhaps want to expose more for the sky, in which case you’ll need to lighten up the ground during the photo edit stage. Or, take two photos, exposing one for the sky and one for the ground. Combine those two images into a single image with your photo editing software.

The view from the Mancos Valley Overlook, Mesa Verde National Park / Rebecca Latson
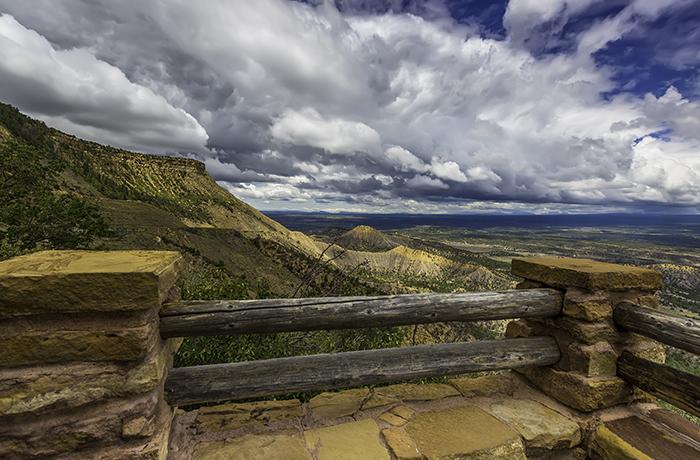
The view from the Mancos Valley Overlook, Mesa Verde National Park / Rebecca Latson

Sunrise at the Mancos Valley Overlook, Mesa Verde National Park / Rebecca Latson
Stop 2: Mancos Valley Overlook – This is the first overlook upon entering the park where you can achieve true scenic landscape shots. There’s a small paved parking area and a shelter to protect from the elements. The sunrises here are wonderful, as are the broad encompassing views of the panorama below. You’ll definitely need your grad ND filter for this stop, and you might want to try out your circular polarizer at this scene, as well.
If you are there for a sunrise, aim your camera in the direction you see in the image above. Use a low ISO (anywhere from 100 to 250) to prevent graininess as much as possible. Keep your camera on a tripod, and play around with apertures and shutter speeds. For a sunrise, you really want to expose more for the sky in order to get all the wonderful colors as well as a good shape to the sun and your grad ND will come in handy, here. If you want to get that sunburst (aka sunstar) effect where the sun has star-like rays coming from it, try setting your aperture anywhere between f11 and f22. Play around with your shutter speed and ISO settings so your foreground is not completely underexposed. As with the advice above for Stop 1, you can lighten up the ground in your photo editor or you can take duplicate photos – one exposed for the sky and one for the ground – then blend them together into a single image.
Note that I included the overlook's fence railings in these images. It's a personal preference. I liked the look of the railings and they added a sense of perspective: this is where I was standing when I looked out at the amazing vista at this overlook.

Rabbitbrush, Montezuma Valley Overlook, Mesa Verde National Park / Rebecca Latson
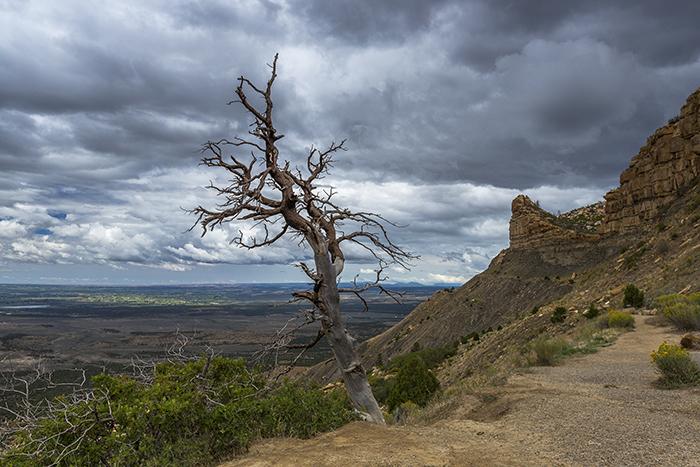
The view at the Montezuma Valley Overlook, Mesa Verde National Park / Rebecca Latson
Stop 3: Montezuma Valley Overlook – With the Mancos Valley Overlook, you have an expansive panoramic view from one side of the national park. The Montezuma Valley Overlook offers an equally expansive view from the other side of the park. This includes the much-photographed lone tree with twisted branches against the background of either the valley below or the Knife Edge (that part of the mountain that almost looks like another creation of the Ancestral Puebloans).
To make sure both tree and background are nicely focused, you will perhaps want to use a wide-angle lens and focus close to infinity, then crop the image, if you so desire, during the editing stage, to bring the scene with the tree closer to the viewer’s eye. Or, you may wish to get a little closer to the tree and experiment with small apertures (anywhere from f9 to f16) in order to create a deep depth of field (as opposed to a shallow depth of field, where only your subject is in focus and everything else around it is unfocused).
The Mancos Valley Overlook is a great place for sunrises, so it makes sense that this overlook on the other side of the park is great for sunsets. If you are a night owl (unlike me), then stick around and capture the sun as it sets below the horizon.

Park Point Overlook Sunrise, Mesa Verde National Park / Rebecca Latson

Park Point Overlook sunrise, Mesa Verde National Park / Rebecca Latson

Late afternoon at Park Point Overlook, Mesa Verde National Park / Rebecca Latson

Ribbon of highway seen from Park Point Overlook, Mesa Verde National Park / Rebecca Latson
Stop 4: Park Point Overlook – I drove to this place one morning trying to get a cell signal, since it’s the highest point in the park, with an elevation of 8,572 feet. While there, I discovered the totally amazing sunrise views. This is the best place for sunrise shots, in my opinion and you will definitely need to use your grad ND filter as the sun continues to rise and lighten up the sky. As with Stop 2, you’ll want to follow the suggestions for getting sunburst effects as well as to try and correct exposure issues. I guarantee you will want to visit this overlook more than once and not just in the morning. You’ll want to see the changes in light during different times of day (not to mention different seasons and under different weather conditions).

Morning rays at Geologic Overlook, Mesa Verde National Park / Rebecca Latson
Stop 5: Geologic Overlook – This stop is not too far from Park Point Overlook. The view is a tad more north than the view at Stop 4, but it’s also a lovely place to catch during the morning hours. Try hunkering down low to the ground with your camera while using a wide-angle lens (anywhere from 11mm to 35mm). This type of lens creates an exaggerated effect of making foreground images larger than they really are, while creating a bit of distance between foreground and background. Photographers use this to great advantage to create a sort of 3-dimensional feel to the photo that leads the viewer’s eye from foreground to mid-ground to background, much like a leading line.

Bee and thistle, Mesa Verde National Park / Rebecca Latson
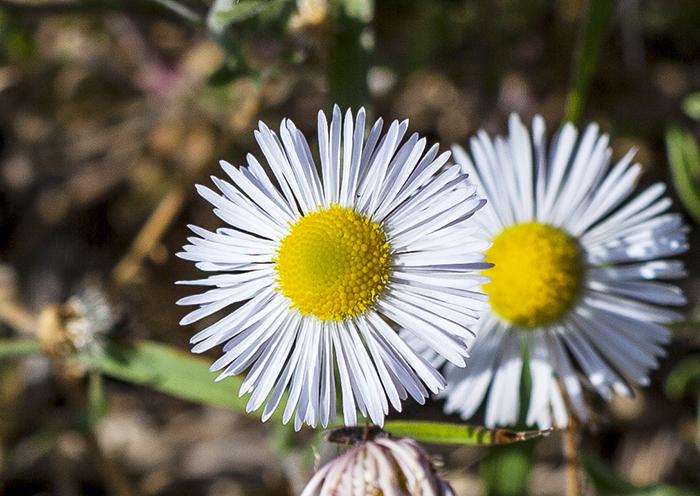
Fleabane, Mesa Verde National Park / Rebecca Latson
Stop 6: The Path Between Far View Lodge and Far View Terrace – All along this path are photo opportunities of the flora and fauna kind. You’ll see flowers flanking both sides of the path from the parking lot all the way to the Far View Terrace gift shop and restaurant. When the flowers are in bloom, the bees will be buzzing around, collecting pollen. You might also see a deer or two. This is a great place for you to use your macro setting on your point & shoot, your macro lens on your SLR, or a close-up lens filter that screws around the top of the lens like any other filter, allowing you to get some nice close shots of flowers, leaf details, and insects. Make sure you "fill the frame" with your subject. Eliminate anything that might distract from the object of your and your viewer's attention.

Keyhole kiva at Coyote Village, Far View Site, Mesa Verde National Park / Rebecca Latson

Mid morning at the Far View Site, Mesa Verde National Park / Rebecca Latson

Early afternoon at the Far View Site, Mesa Verde National Park / Rebecca Latson

Far View Site keyhole kivas and tower, Mesa Verde National Park / Rebecca Latson
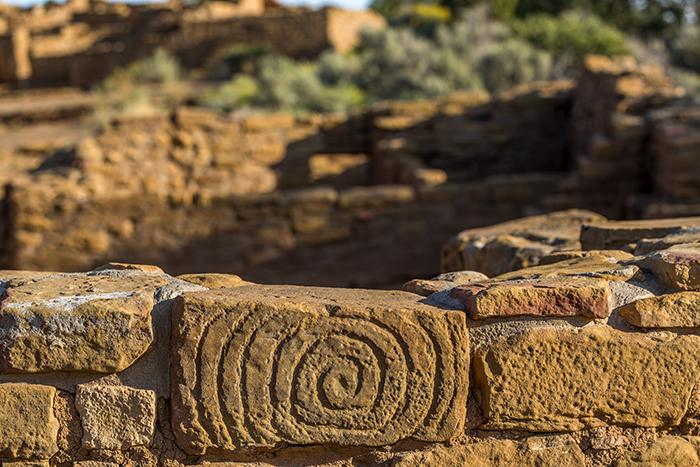
The spiral brick at Pipe Shrine House, Far View Site, Mesa Verde National Park / Rebecca Latson
Stop 7: Far View Sites - Here is the first set of ruins just off of the road which you can walk around and actually touch. The path is dirt and gravel but not difficult to maneuver. Take wide angle images of the keyhole kivas at Coyote Village, and close-up images of the brick details (like the spiral brick I spotted at Pipe Shrine House). Standing right there among the ruins allows you to take your time observing your surroundings while you breathe in the dry, fresh air. Morning and evening offer great opportunities to photograph the rich colors of the ruins and the sky. Shadowed areas add depth to your compositions. On the other hand, midday lighting allows you to capture the architectural details of every nook and cranny without much, if any, shadow. Photograph this site during morning, midday and evening and decide which images tell the story the best. Perhaps you’ll discover that it takes photographing this site all three times of the day to tell the complete story.
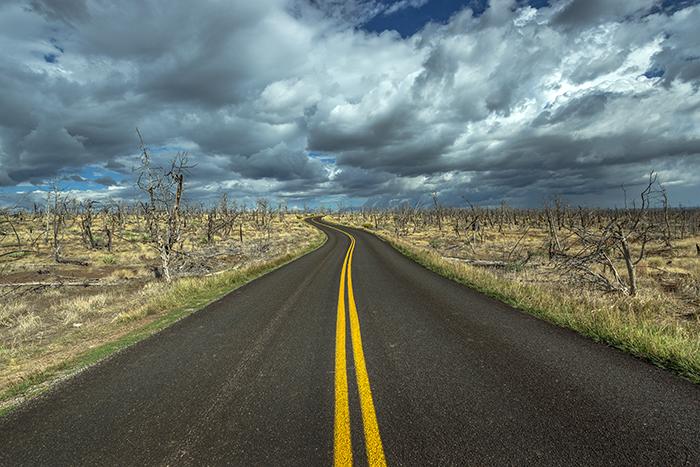
Road to the ruins, Mesa Verde National Park / Rebecca Latson

Photographer's shadow over Cliff Palace, Mesa Verde National Park / Rebecca Latson

Evening at Cliff Palace, Mesa Verde National Park / Rebecca Latson

The waiting area for the Balcony House tour, Mesa Verde National Park / Rebecca Latson
Stop 8: The Loop Road to Cliff Palace and the Cliff Palace Overlook – Here’s a great opportunity to get a “leading line” shot of the road and the spindly, twisted, fire-ruined trees on both sides of the road. Just make sure to keep your eyes open and ears cocked for oncoming cars. FYI, a leading line shot is a photo with some sort of line, either natural or manmade, that “leads” the viewer’s eye from one edge of the photo to the other edge, or from the foreground deep into the background.
If you are unable to take the Cliff Palace or Balcony House tours, or just don't feel up to it, that's ok. Look around you. You might find something else interesting to photograph within your reach. The image above of the Balcony House waiting area was interesting to me not only for the texture of the covering over the seats, but the slight curveature of the seating arrangement itself.
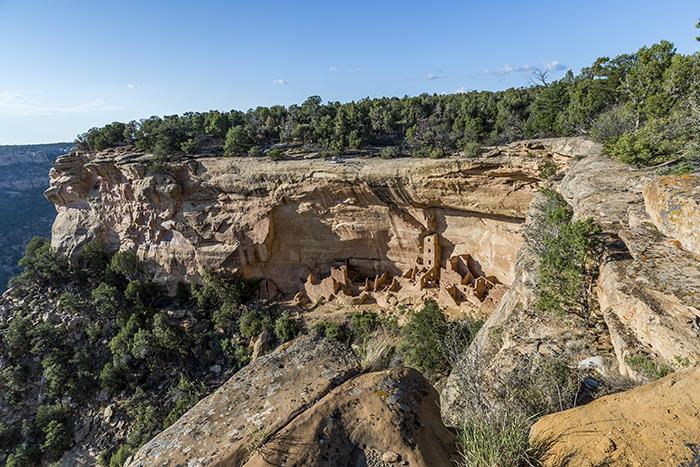
Evening at Square Tower House, Mesa Verde National Park / Rebecca Latson

Pit house excavation, Mesa Verde National Park / Rebecca Latson

Pit house kiva, Mesa Verde National Park / Rebecca Latson
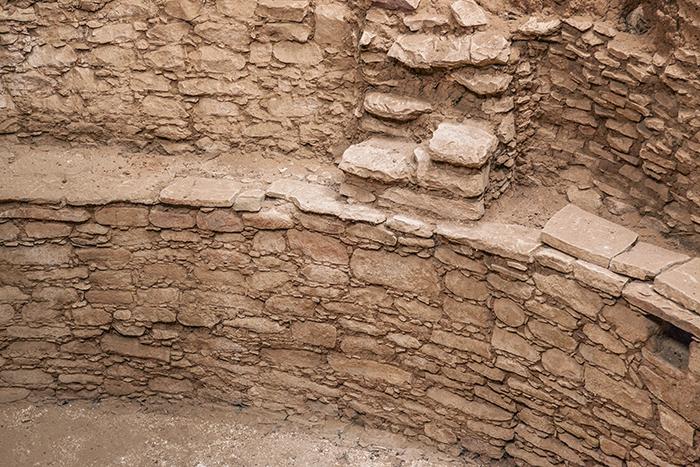
Pit house kiva detail, Mesa Verde National Park / Rebecca Latson
Stop 9: The Mesa Top Loop View Areas, including Square Tower House and the Pit Houses – Square Tower is an oft-photographed cliff dwelling and with good reason. It’s an “elegant” set of ruins, in my opinion. Sometimes, the park service offers a backcountry hike into this cliff dwelling. If they offer it while you are there and you feel up to it, I would urge you to try it out. Had they offered this hike during my stay, I would have taken it (and I am no mountain goat, by any means).
Park your vehicle at each of the signed view areas you see. Most of them are right next to the road, are paved or have well-tended gravel and are “accessible with assistance” (per the NPS website for this national park). Study the pictorial display at each stop and then look out to the cliffs across the canyon. Look closely – use your telephoto lens or the telescopes or built-in binoculars at the stops. The Ancestral Puebloans were masters of camouflage. Do you spy a wall with square windows or doorways way off in the distance? Those tall “windows” are actually door entrances. Contemplate how the Ancestral Puebloans gained ingress and egress to these dwellings in the overhangs and shelters of the canyon walls.
You might look at the pit houses and think “bleah”. While pit houses are not located in dramatic settings like the cliff dwellings, they do offer photo ops incorporating all sorts of interesting close-ups and angles of a more intimate composition. The pit house I visited with a ranger-led group had a building constructed over the dig, so the lighting inside was either natural or dim, at best. In this instance, you’ll want to bump up your ISO and/or your aperture. If hand-holding your camera, then you’ll need to make sure your shutter speed is fast enough to counteract blur from camera shake. Capture wide-angle shots of the area and then get a few close-ups of the architectural details such as the way the Ancestral Puebloans laid the bricks with which they built their kivas.
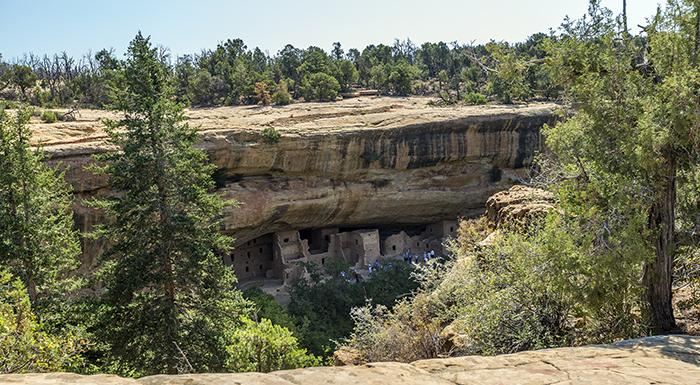
Spruce Tree House, Mesa Verde National Park / Rebecca Latson

Looking into Spruce Tree House, Mesa Verde National Park / Rebecca Latson
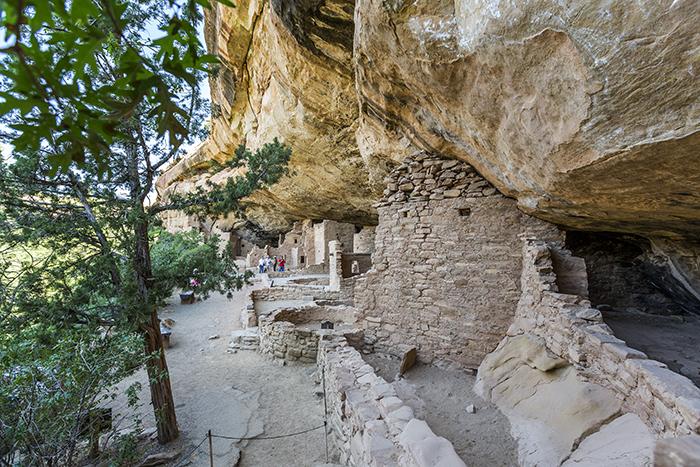
A side view of Spruce Tree House, Mesa Verde National Park / Rebecca Latson

Manos and metates at Spruce Tree House, Mesa Verde National Park / Rebecca Latson
Stop 10: Spruce Tree House – This is one set of ruins that is accessible “with assistance” via a paved trail leading from the Chapin Mesa Archeological Museum right down to the cliff dwelling. The trail can get a little steep and parts of it are gravel rather than pavement, but if you are up to it, then it’s a beautiful opportunity to get close up and personal with your tripod and camera. Capture both wide-angle shots as well as close-ups here. Bump up your ISO to maybe 640 to 1200 (or a little more) and open up your aperture. During the editing stage, you might need to reduce the shadows and lighten/brighten the scene a bit and you may even need to use some noiseware software to remove that graininess in the image.
Like Cliff Palace, this is a popular site, so resign yourself to the fact that you may end up including one or more people in your compositions. Remember, this is a national park that’s all about the people (ancient people, that is), so inclusion of humans in your shot lends a sense of reference and scale. Early mornings and later in the evenings will see less people, but you will have more shadowed details with which to contend in your compositions.
While you are there, don't forget to look at the little things within Spruce Tree House, like the manos and metates seen in the image above. These were stone implements used to grind corn for food and paints for pottery and rituals. These items help us modern humans flesh out the lives of the Ancestral Puebloans since they left no written account.

Looking back along Petroglyph Point Trail toward the Chapin Mesa Museum, Mesa Verde National Park / Rebecca Latson

Tight squeeze ahead along Petroglyph Point Trail, Mesa Verde National Park / Rebecca Latson
Stop 11: The Petroglyph Point Trail – When you are finished photographing Spruce Tree House, perhaps you will want to walk a little bit of this trail (you’ll need to register at the Chapin Mesa station for this hike). It’s a 2.4-mile roundtrip hike and I admit, I just couldn’t finish this trail, so I never saw the petroglyphs. My knees hurt too much after less than a mile because there is quite a bit of steep climbing up and down (even with the assistance of rough steps). Regardless of the fact that I did not finish this trail, I did capture some neat images, and thus proved to myself and to you readers that you don’t have to hike the entirety of an established trail to get great photos.

Canyon view along Wetherill Mesa Road, Mesa Verde National Park / Rebecca Latson
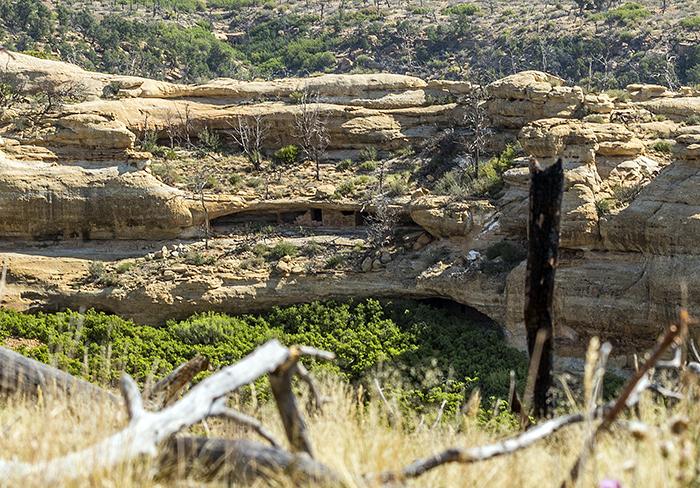
Cliff dwelling view from Wetherill Mesa Road, Mesa Verde National Park / Rebecca Latson
Stop 12: Wetherill Mesa Road – All along this road are opportunities to stop and drink in the canyon views and take a landscape photograph or two. With sharp eyes, you might see a cliff dwelling across the canyon or a deer across the road. If the flowers are blooming, you’ll want to stop and get some macro or macro-type shots of the colorful blossoms.
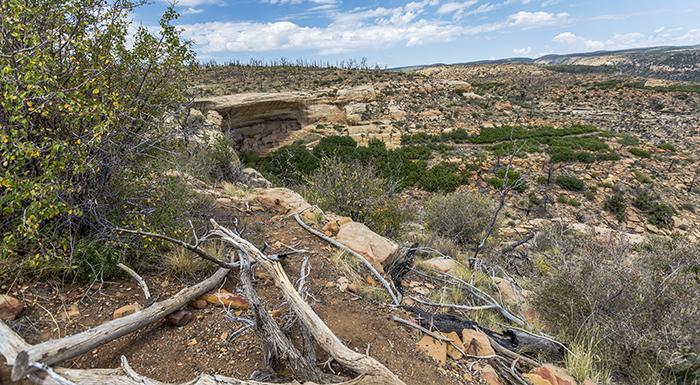
The view toward Step House, Mesa Verde National Park / Rebecca Latson

The path to Step House, Mesa Verde National Park / Rebecca Latson

Pit home detail at Step House, Mesa Verde National Park / Rebecca Latson

Petroglyphs at Step House, Mesa Verde National Park / Rebecca Latson

Petroglyphs and pottery shards at Step House, Mesa Verde National Park / Rebecca Latson

The hand print of Man (or Woman) at Step House, Mesa Verde National Park / Rebecca Latson
Stop 13: Step House – Located at the end of Wetherill Mesa Road, Step House is a cliff dwelling accessed via a paved trail and some steps in places. You don’t need to purchase a ticket to these ruins and you don’t need to have a ranger lead you along, either, if you prefer to do the self-tour thing. This is a great cliff dwelling to get not only pit house photos but also petroglyph and kiva shots. Look closely enough and you might even see the hand print (or ask the ranger stationed there to point it out for you).
After visiting these ruins created by the Ancestral Puebloans, you now know this ancient people not only possessed a sense of drama but also understood the value of location, location, location (for the view and for the proximity to a water source). While I have left out images of a number of the most popular cliff dwellings (Cliff Palace, Balcony House and Long House) because of the level of activity involved at getting to these ruins, I can tell you I have taken the ranger-led tours to see and photograph these sites and they are amazing. There were also other landscape views and overlooks of ruins which I just never managed to access during my stay within the park (Window To The Past and Fire Recovery Viewpoint along Wetherill Mesa Road, for instance).
When you visit Mesa Verde National Park, think about visiting the ruins and cliff dwellings more than once a day. Go in the morning and during mid-day and in the evening. Note where the sunlight hits each dwelling during the space of a day. The lighting around Cliff Palace and Square Tower is the best in the late afternoon and evening, while Step House photographs quite well in the morning hours. The NPS Mesa Verde National Park website has a great page dedicated to the best time of day for photography by season, as well as a link to another page for site-specific photography.
Take both horizontal (landscape) and vertical (portrait) compositions. Take close-up and wide-angle shots of the same subject. Try out some of the photography “rules” about which I wrote in my very first article for the Traveler. For example, use the “Rule of Thirds”: mentally divide your camera’s viewfinder into three segments either horizontally or vertically (did I apply this rule in any of the images you see in this article?) Place your subject on the far left, right, top or bottom of your view. Now, which layout tells the story better? Which layout says what you want the image to say?
Appreciate the hands of Ancestral Pueblo Man and Woman in not only the construction of these cliff dwellings but also the daily rigors as well as the cultural richness of the lives inhabiting these dwellings. Show this appreciation in your photographs and that admiration will be passed along to those who view your photos.

Sunrise at Mesa Verde National Park / Rebecca Latson


 Support Essential Coverage of Essential Places



Comments
Wonderful pictures, as always, Rebecca! Thanks.
Why did the peoples here live in the cliiffs and not on the mesa'a. Seems like it was harder to build and get to so many of the dwellings tucked into the cliffs?
Keep these armchair guides coming! It's great to have a guide to photogenic spots that us crunchy-knee folks can actually get to!
Just found this guide, thanx, we're headed there Labor Day. . .lots of good info !