
Hiking among the geology at Bryce Point, Bryce Canyon National Park / Rebecca Latson
If you read Part 1 of this Armchair Photography Guide, you’ll have followed me through a photographic journey of Bryce Canyon National Park, from Sunrise Point to Sunset Point and along the Rim Trail between those two view areas, with side hikes on the Queens Garden Trail and a portion of Navajo Loop Trail. This article continues the narration, moving from Inspiration Point to Paria View, Bryce Point, and view areas further south, including Farview Point, with an elevation of 8,819 feet, all the way to the end of the road at Rainbow Point, elevation 9,115 feet, including a 1-mile hike to view 1,800-year-old bristlecone pines on Bristlecone Loop Trail.
For a list of gear advice, refer back to Part 1. Click this link to see a map of the entire park.
The Armchair Photography Guides are for those people who cannot, or don’t want to, hike long distances to achieve great photos using any camera (SLR, point-and-shoot, smartphone). This particular guide is also a helpful primer for first-time visitors to Bryce Canyon, as well as for those of you revisiting this national park who might find the tips, techniques and advice helpful for your own photography.

A map view of Inspiration Point to Bryce Point, Bryce Canyon National Park / NPS
Inspiration Point, elevation 8,100’
Inspiration Point is a little less than 2 miles south of the visitor center. You can drive, take the shuttle, hike along the Rim Trail or bike/hike on the shared-use path to reach this overlook. I personally think Inspiration Point (and Bryce Point, too, actually) is the view most representative of this entire national park. You’ll see a real-life diorama of the geologic formation of hoodoos, from erosion within the amphitheater wall to creation of fins, spires, and hoodoos.

A wide-angle view at Inspiration Point, Bryce Canyon National Park / Rebecca Latson
So, what is the difference between a spire and a hoodoo? According to the National Park Service, a hoodoo has a “totem pole-shaped body,” while a spire “has a smoother profile or uniform thickness that tapers from the ground upward.” You’ll see all of that and more at Inspiration Point.
To get as much of this amphitheater into your viewfinder as possible, use a lens with a focal length anywhere between 14mm to 16mm. If you go wider than that (8mm – 11mm), keep in mind your resulting photo might be more of a fish-eye, particularly if you are using a full-frame SLR. Of course, you can also take multiple images for a panorama, stitching them together with your photo editing software. However you wish to capture a wide-angle shot, remember to make a careful consideration of your composition.

A sunny, wide-angle view of Inspiration Point, Bryce Canyon National Park / Rebecca Latson
You see, part of the viewing area along the trail is fenced in, so placing a tripod close enough to the edge of the fence to get an unencumbered view might be problematic with a wide-angle lens, which could include a portion of the fence in your image. Sure, you can crop out the offending portions, but that may also crop out part of what you want for your wide-angle view. Walk back down the trail past the fenced area and remember to watch your step.
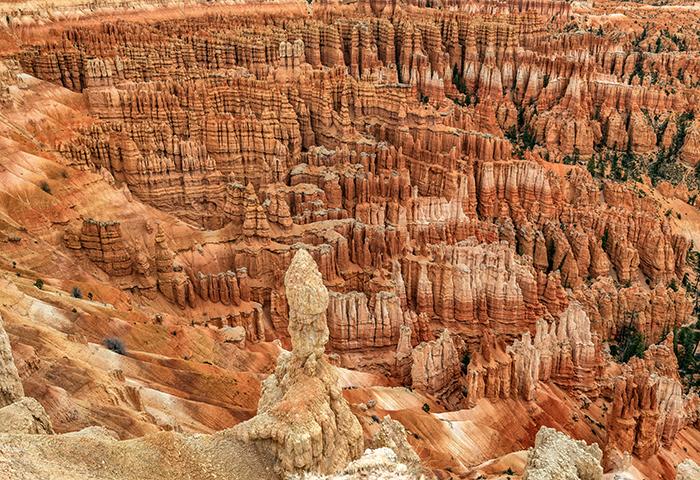
A closer look at the crazy formations of Inspiration Point, Bryce Canyon National Park / Rebecca Latson
As you walk further down the trail you’ll see a log bench. It’s perfect for a selfie. After all, who wouldn’t want to brag about visiting a place like this?
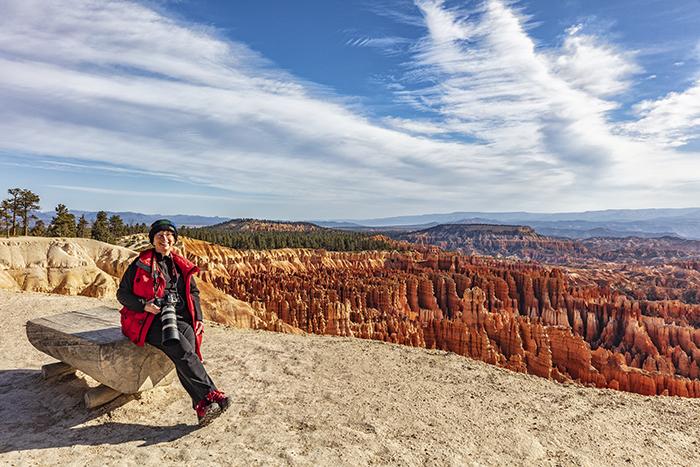
The photographer taking a break at Inspiration Point, Bryce Canyon National Park / Rebecca Latson
Sunrise is spectacular here, particularly at Upper Inspiration Point, just a short, steep hike further upward along the Rim Trail from the lower Inspiration Point. Upper Inspiration Point will provide you awesome views to the north/northwest and east/southeast.

Sunrise seen from Upper Inspiration Point, Bryce Canyon National Park / Rebecca Latson

The golden light of sunrise at Upper Inspiration Point, Bryce Canyon National Park / Rebecca Latson

A southeast sunrise view at Upper Inspiration Point, Bryce Canyon National Park / Rebecca Latson
If you use a tripod for your sunrise shots, you'll be able to set the ISO around 200, keep your aperture small (f/9.0), and use a slower shutter speed (1 second or longer). If you handhold your camera, remember to bump up the ISO to between 400 - 1600, slow your shutter speed down to 1/20 - 1/25 of a second, and open up your aperture to maybe f4. If your camera body or lens has image stabilization (IS / VR), then turn that on and don't forget to use the burst method of holding down on that shutter button for several clicks to achieve at least one clear, sharp shot.
These are just suggestions, of course, and you'll want to experiment with your own settings. You might even want to try and create a sunburst as the sun begins to peek above the horizon. For this technique, you'll definitely want to use a tripod since you'll be setting your aperture to f/22 and using a slower shutter speed and higher ISO to compensate for such a small lens opening. Using a wireless shutter release or a cable shutter release is helpful in preventing camera shake from your finger pressing down on the camera shutter button. You can also use your camera's 2-second timer delay. Remember to turn off your image stabilization if you use a tripod.
Even if you miss the sunrise, morning still provides wonderful light and shadows right up to around 9 a.m. or 10 a.m., as the majority of the surreal formations are clustered within the northwest portion of the amphitheater. On overcast days, you don't really need a circular polarizing lens (CPL) but you’ll probably want to utilize one on sunny days. A grad ND comes in handy, because the sky will be brighter than the amphitheater view below, even on overcast days. For an explanation of CPL and grad ND filters, refer back to Part 1 of this Armchair Photography Guide.
Telephoto Landscapes
It goes without saying, you'll get shots of wide-angle vistas, but you need to use your telephoto lens (anywhere from 70mm to 400mm), as well. It's the close-up images of these weird and wonderful formations that give your viewer an idea of Bryce Canyon's geology. As you compose your close-up shots, think of a hoodoo or spire as you would a person standing up. How far up or down do you want to cut off the “legs?” Do you want to show the formation from the ground up? Do you want to zoom in a little closer for a more detailed look at the geology? What about that tree you see growing on the slope beneath the tall formations: do you want to photograph the entire tree and use a portion of the formations as a background, or capture tree and formations, bottom to top? Give some thought to your compositions.

Fins, spires, and hoodoos at Inspiration Point, Bryce Canyon National Park / Rebecca Latson
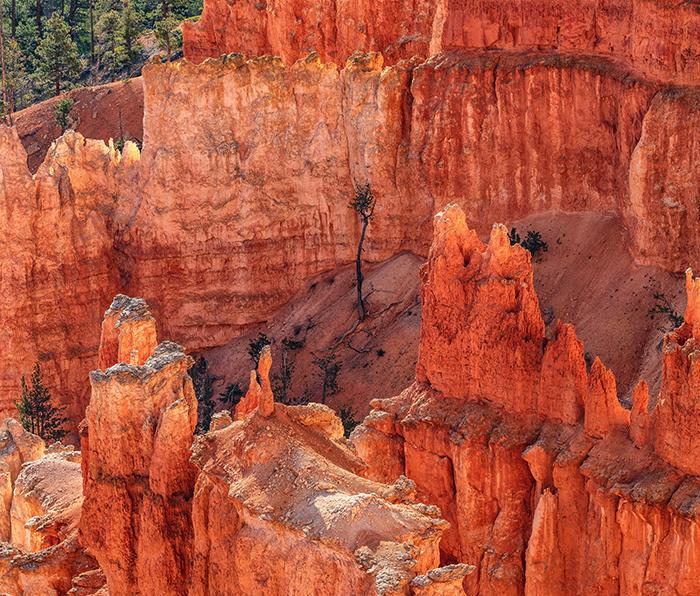
A solitary tree hanging in there amongst the giants, Bryce Canyon National Park / Rebecca Latson
While you are at this overlook, cast your eyes far across the amphitheater to the north toward the Sunset Point view area. Can you also see the small speck of Sunrise Point beyond that, in the upper left of your line of sight? Zoom in to include both of those view points. Your telephoto lens will create an interesting effect called “compression”, causing the far away scenery to "squeeze" nearer to your subject. You'll often see this with telephoto shots of people standing in front of a waterfall. The waterfall, in reality, is quite a distance from the person in the image, but due to the telephoto compression effect, it will look practically within spitting distance of the people.

An Inspiration Point view of Sunset and Sunrise Points, Bryce Canyon National Park / Rebecca Latson
Take time to hike a little bit of the Rim Trail between Inspiration and Bryce Points. The views are incredible with plenty of photo ops.
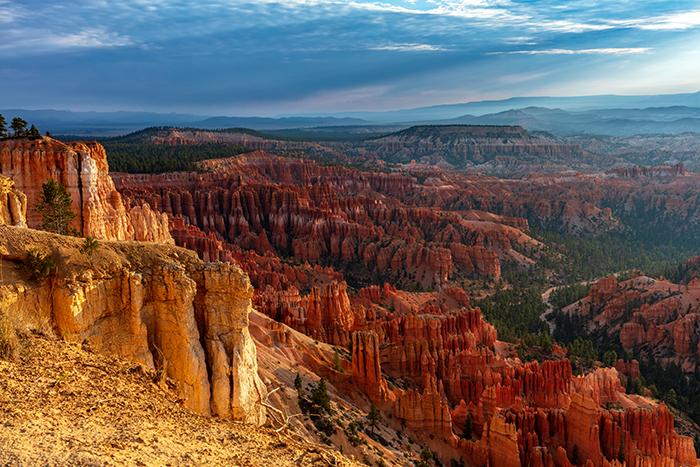
A Rim Trail view of the scenery between Inspiration and Bryce Points, Bryce Canyon National Park / Rebecca Latson
Take your eyes (and camera) away from the canyon view and point them toward the other side of the trail, toward the southwest to view markedly different scenery.

A southwest view along Rim Trail, Bryce Canyon National Park / Rebecca Latson
Use the trees and rock walls as natural frames for your subject.
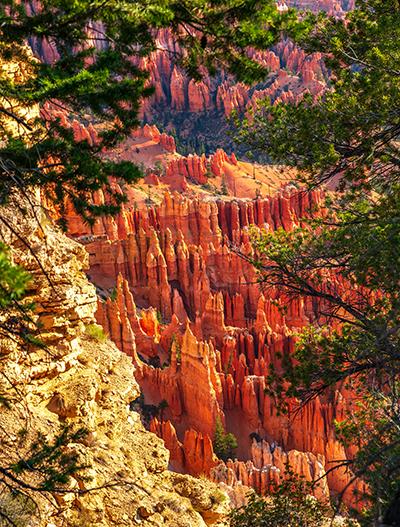
Natural frames, Bryce Canyon National Park / Rebecca Latson
Don't forget to look for the little things around you.

Hidden, Bryce Canyon National Park / Rebecca Latson
Single out the textures, patterns and colors of which Bryce Canyon scenery is comprised. I wrote an article about this a few months ago, as a matter of fact.
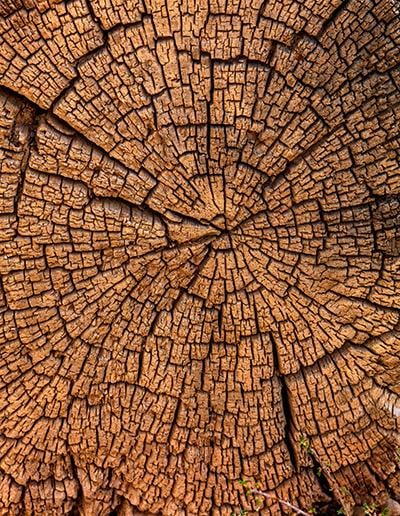
A wood maze, Bryce Canyon National Park / Rebecca Latson
Paria View, elevation 8,176'
Depart Inspiration Point and continue to Bryce Point. Along the way, you’ll see a turnoff to the right for Paria View, a smaller canyon offering a different perspective of the park. Get both distant shots of the overall landscape as well as close-ups of specific formations. Who knows, you might even be visited by a small furry denizen dwelling within this national park.

The scenery at Paria View, Bryce Canyon National Park / Rebecca Latson
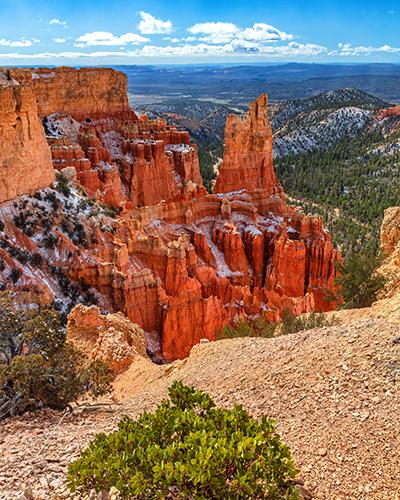
More scenery at Paria View, Bryce Canyon National Park / Rebecca Latson
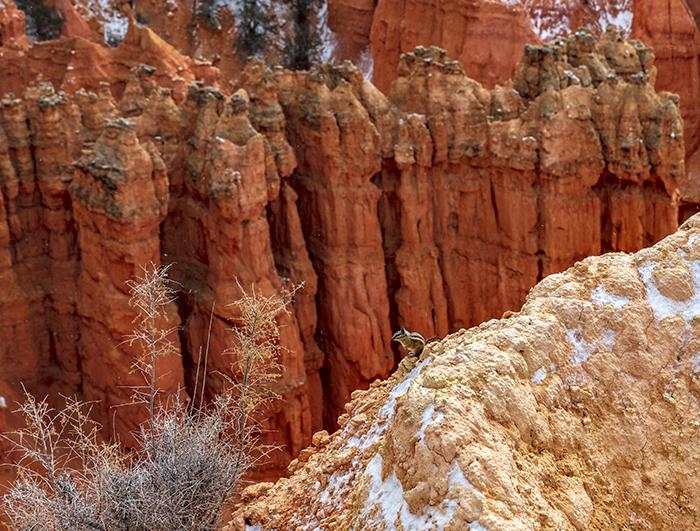
A tiny denizen at Paria View, Bryce Canyon National Park / Rebecca Latson
Bryce Point, elevation 8,296’
This is another all-encompassing overlook, with more views to the north/northwest and east/southeast. Here is where you can hike the Peekaboo Loop Trail, visible from the overlook. Bryce Point sunrises are also show stealers, and you can photograph the sun rising above the mountain rim then move your camera and tripod over to capture the golden light bathing the rocket ship-shaped hoodoos. The name of those hoodoos is “Silent City,” but to me, they look like deep red-and-orange stone rocket ships ready for liftoff.

A sunny, spring morning at Bryce Point, Bryce Canyon National Park / Rebecca Latson

Ready for take off at Bryce Point, Bryce Canyon National Park / Rebecca Latson

Silent City and Peekaboo Loop Trail, Bryce Point, Bryce Canyon National Park / Rebecca Latson

A raven's view of Peekaboo Loop Trail, Bryce Canyon National Park / Rebecca Latson

More crazy geology at Bryce Point, Bryce Canyon National Park / Rebecca Latson
Even when the day is cloudy or the light flat because of the time of day, the views are still stupendous, and so are the photo ops.

A muted morning over Bryce Point, Bryce Canyon National Park / Rebecca Latson

A telephoto landscape at Bryce Point, Bryce Canyon National Park / Rebecca Latson

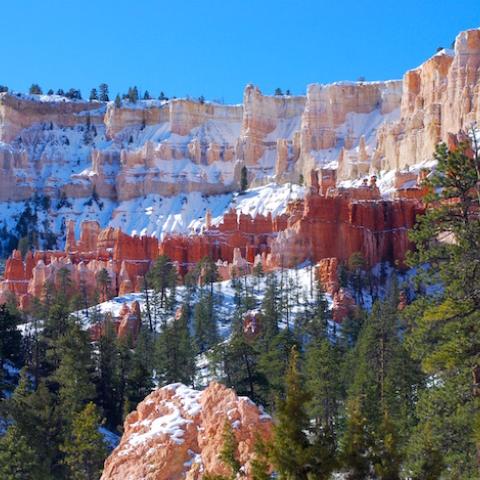
A view of Bryce Point on a chilly spring day, Bryce Canyon National Park / Rebecca Latson
Bryce Point is another great location to capture telephoto close-ups of hoodoos and spires. Isolate a formation and experiment with different image placement: center the composition, use the Rule-of-Thirds technique and place your subject to one side of your frame, or zoom really close to fill the frame with hoodoo detail. Get images of the teeny tiny people you see on those trails. They add fantastic scale to the immensity of the landscape. You might even get lucky and spot trail riders on horseback far below.
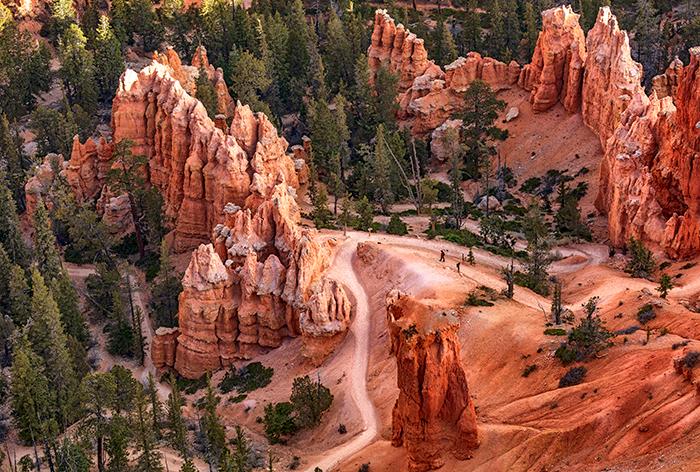
Tiny hikers on the Peekaboo Loop trail at Bryce Point, Bryce Canyon National Park / Rebecca Latson

A tree and a hoodoo on the slope at Bryce Point, Bryce Canyon National Park / Rebecca Latson
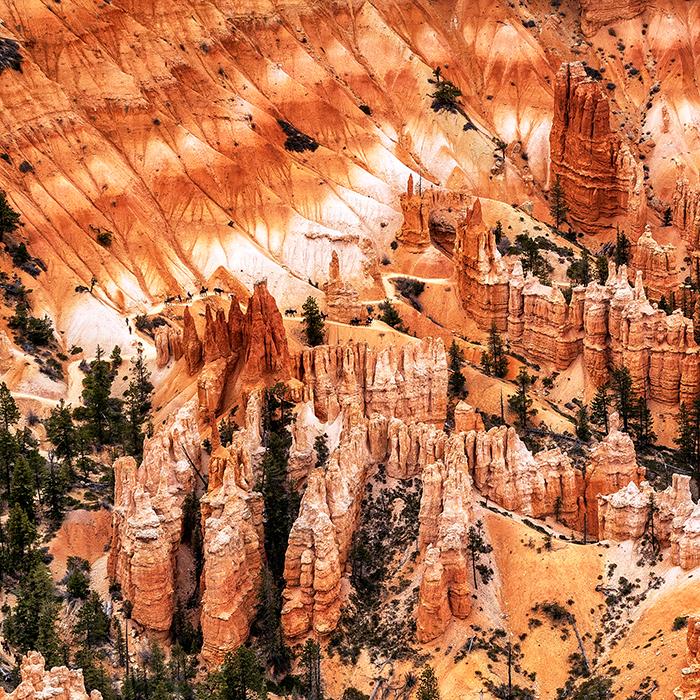
Tiny hikers and horseback riders among the hoodoos at Bryce Point, Bryce Canyon National Park / Rebecca Latson
From Bryce Point, return to the main park road, turn left and head south toward Rainbow Point. Drive this road while the weather is nice, because inclement weather may cause this road to close, as it did after a spring snowfall during my April visit.
All of the view areas are on the left side of the road as you head south, so think about driving directly to Rainbow Point and stop off at these overlooks on your way back down, when they are on your side of the road. To keep track of where each image was captured, a good rule is to photograph the view area sign first thing prior to photographing the scenery. When you download your images, the sign photo will show up first before the photos specific to that view.
At these next stops, frame your composition for at least one wide-angle image to encompass most of the view area, then single out and zoom in on one or more of the intriguing formations. Each separate, unique view is a part of the whole of Bryce Canyon National Park. Take your time, frame your composition carefully, and enjoy the ascent to your final elevation of 9,115' above sea level. It will probably be windy and, depending upon the season, might be quite chilly and rainy, as well.

A map view from Farview Point to Rainbow Point, Bryce Canyon National Park / NPS
Piracy Point / Farview Point, elevation 8,819’
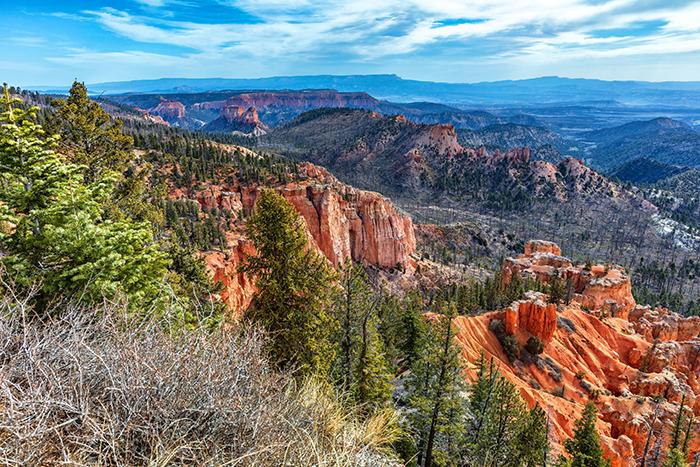
A wide-angle view at Piracy Point, Bryce Canyon National Park / Rebecca Latson
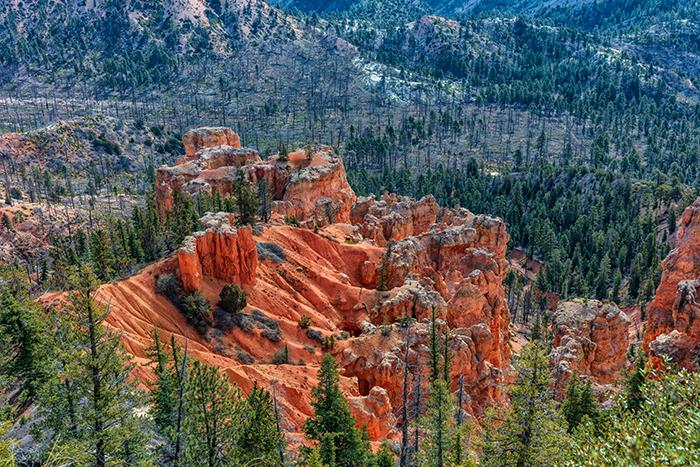
A close up of a far view at Farview Point, Bryce Canyon National Park / Rebecca Latson
Natural Bridge, elevation 8,627’
Natural Bridge is not really a bridge, but an arch formed over time by frost wedging (water freezing and expanding in cracks), chemical dissolving of the rock by rainwater, and gravity's insistent tug. Capture a wide-enough shot to include one or more trees, then - vertically or horizontally - zoom in closer to the arch, cropping out extraneous background.

A wide view of Natural Bridge, Bryce Canyon National Park / Rebecca Latson
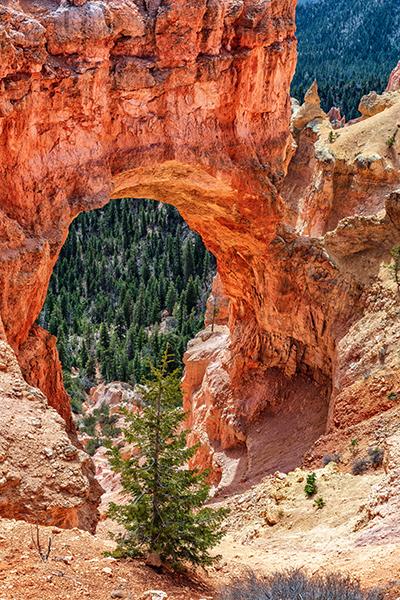
A closer look at Natural Bridge, Bryce Canyon National Park / Rebecca Latson
Agua Canyon, elevation 8,800’
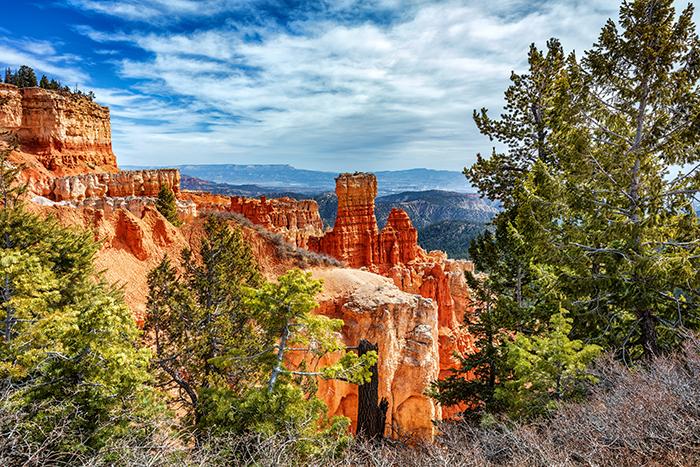
A view from the Agua Canyon Overlook, Bryce Canyon National Park / Rebecca Latson

Nowhere to grow but up for these pines perched precariously atop a hoodoo at Agua Canyon, Bryce Canyon National Park / Rebecca Latson
Ponderosa Canyon, elevation 8,904’

A look at the park from Ponderosa Point, Bryce Canyon National Park / Rebecca Latson
Black Birch Canyon, 8,750’

Natural framing around a Black Birch Canyon scene, Bryce Canyon National Park / Rebecca Latson
Rainbow Point / Yovimpa Point, elevation 9,115’
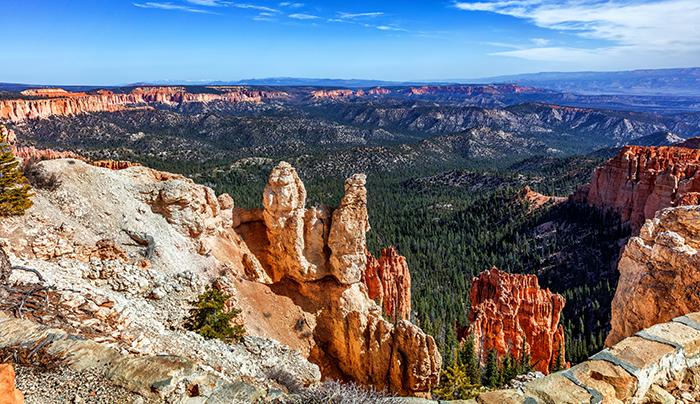
An expansive view at Rainbow Point, Bryce Canyon National Park / Rebecca Latson

A telephoto landscape at Rainbow Point, Bryce Canyon National Park / Rebecca Latson
While you are parked at Rainbow Point, hike the Bristlecone Loop Trail for amazing vistas and views of 1,800-year-old gnarly, bare bristlecone pines. Keep a weather (pun intended) eye out for rainstorms. Lightning strikes are common, particularly during the summer monsoons, and you might see isolated charred trees or small charred areas on the ground alongside the trail from previous strikes.
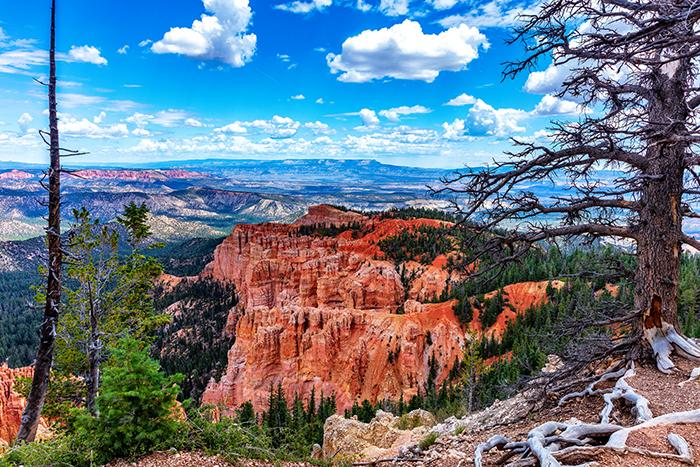
A Bristlecone Loop Trail vista at the Rainbow Point stop, Bryce Canyon National Park / Rebecca Latson

Bare and bristling, Bryce Canyon National Park / Rebecca Latson
Along the route between Farview and Rainbow Points, there will be a couple of parking areas for overlooks with no names. Stop at one or more of them anyway and capture the beauty of the scenery and the day. You might see some very interesting formations upon which you'll want to focus both attention and camera lens.

A red-rock hoodoo, Bryce Canyon National Park / Rebecca Latson
You’ve reached the end of the park road heading south. Time, now, to return north to the park entrance. Next month’s final Part 3 will guide you through a portion of Fairyland Canyon along the Fairyland Loop Trail.

A lovely place to just sit and think along the Bristlecone Loop Trail, Bryce Canyon National Park / Rebecca Latson


 Support Essential Coverage of Essential Places



Comments
awesome pics of an awesome place